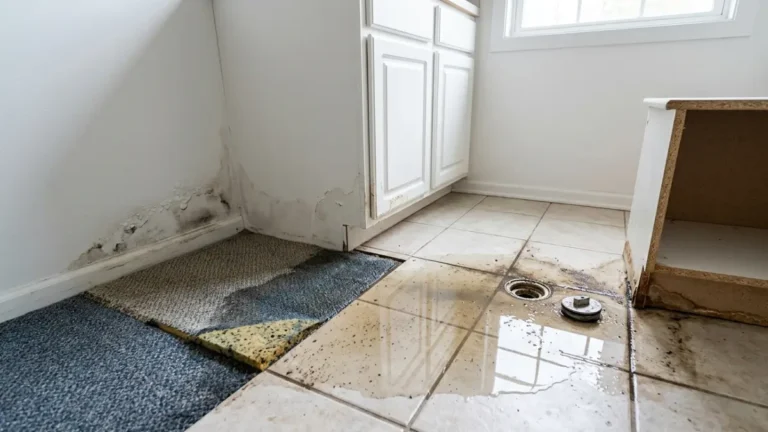
The Overlooked Half of the Water Damage Restoration Process

Water damage restoration has a published standard naming eight things a crew should do before any drying equipment goes in. Most homeowners never see it.
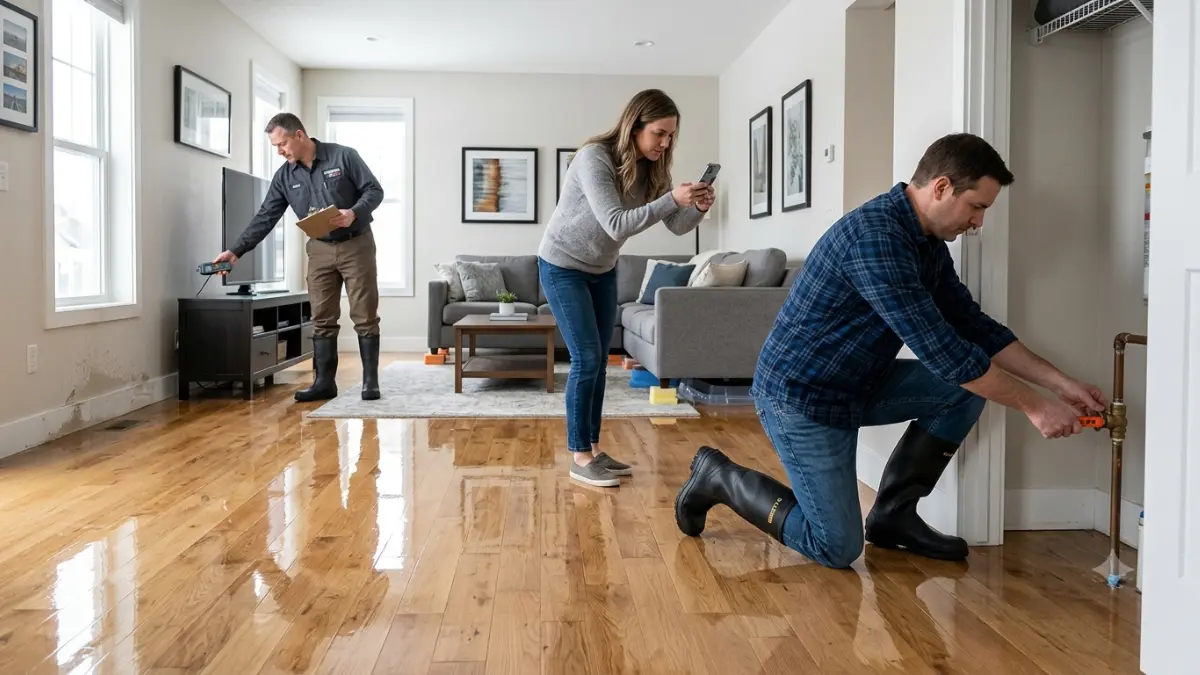
Table of Contents
Water damage: what to do first, based on your situation
Water damage rarely gives you time to read. Find your situation below and start there — the rest will still be here afterwards.
If water is still coming in right now
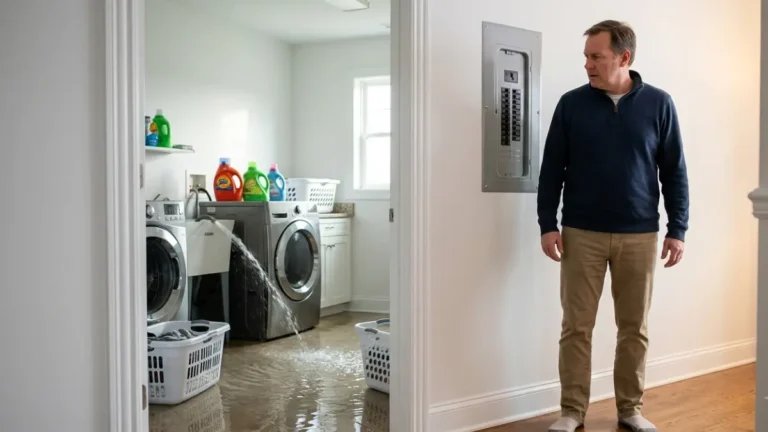
Stop reading and stop the water. Shut the main supply valve if the source is a pipe or an appliance, and get people and pets away from any area where water is near outlets, cords, or the electrical panel.
Come back when the flow has stopped. Nothing else in this article matters until it has.
If a restoration crew is already at your door
You are about to be asked to sign something, and you have time to ask what it is. Skip to the section on what you are being asked to sign, then read the eight steps so you know what the crew should be doing over the next two hours.
If the fans are already running
Your questions are about whether it is working and when it ends. Go to the section on setting the dry standard, then the one on what happens after drying begins.
If you are dealing with the insurance side
Photograph everything before anyone removes anything. Then read the documentation section, which handles the one genuine contradiction in this whole process — you are required to limit further damage, and also expected not to throw things away.
If it is a small spill and you are deciding whether to call anyone
The deciding factor is not the size of the puddle. It is what the water intrusion touched on its way in and how long it has been sitting. The category section tells you which side of that line you are on.
If you rent, or you are the landlord
Responsibility splits differently, and the split is usually written into your lease and your state’s habitability rules rather than into anything a restoration company will tell you. Our guide to what renters can do when a landlord won’t fix a moisture problem covers the escalation path; the documentation section here still applies to you either way.
ℹ️ Safety Note: Water damage response involves several genuine hazards: standing water in contact with energised circuits, ceilings holding pooled water, contact with sewage or grossly contaminated water, running fans before water is known to be clean, mould exposure for infants and people with asthma or weakened immune systems, layperson use of disinfectants and antimicrobials, and gas appliances or HVAC equipment that have been wetted.
The information here is for general understanding. If you are not fully confident, hire a licensed electrician for anything electrical, a licensed contractor or structural engineer for anything structural, and an IICRC-certified restoration professional for the water itself — and follow your local code and permit requirements.
What the water damage restoration process actually is
The water damage restoration process is two different jobs that get billed as one. Knowing where the line falls is the single most useful thing you can learn in the first hour.
Mitigation and restoration are not the same job
Mitigation is the emergency phase: stopping the water, removing it, and drying the structure so the damage stops getting worse. It is measured in days.
Restoration — often called rebuild or build-back — is putting the house back: new drywall, new flooring, paint, trim. It is measured in weeks, sometimes months.
Different crews often do them. Different line items pay for them. Most people budget for one and get billed for both.
The eight things that must happen before the fans go on
The industry consensus standard for this work is ANSI/IICRC S500. In February 2026, the consensus body that maintains it published a position statement restating what the standard requires during the initial response — the first visit, before drying equipment is placed.
At minimum, the restorer should:
- Conduct a site-specific safety survey.
- Identify the customer’s priorities and concerns.
- Verify the source of the water intrusion.
- Identify the extent of the water migration.
- Arrive at a preliminary determination.
- Identify pre-existing damage.
- Identify immediate secondary damage concerns.
- Establish dry standards and drying goals.
That is the whole article. Each of the eight gets a section below, written from your side of the clipboard rather than the crew’s.
📊 Sourced: The eight activities above are listed in Section 10.6 of the ANSI/IICRC S500 standard, quoted in the S500 Consensus Body Position Statement “Category of Water Damage and Weather-related Events,” dated 10 February 2026, which cites the 5th Edition S500 (2021).

- 𝐀𝐜𝐜𝐮𝐫𝐚𝐭𝐞 & 𝐅𝐚𝐬𝐭: Povlen moisture meter uses advanced sensor technology and a smart chip for accurate moisture detection….
- 𝟏𝟎𝟎% 𝐍𝐨𝐧-𝐈𝐧𝐯𝐚𝐬𝐢𝐯𝐞: Povlen wood moisture meter protects surfaces from pinholes and scratches, making it ideal for high-en…
- 𝐕𝐢𝐬𝐮𝐚𝐥 & 𝐀𝐮𝐝𝐢𝐛𝐥𝐞 𝐀𝐥𝐞𝐫𝐭𝐬: This meter is easy to use, featuring auto power off and a low battery indicator. It has a large…
Who decides all this, and on what authority
S500 is a consensus standard produced by an industry body, not a law. No inspector enforces it and no statute requires your restorer to follow it.
What it does give you is a published benchmark. When a crew’s answers line up with it, that is a good sign; when they cannot answer at all, that is information too.
Why the order matters more than the speed
Every page you have read today told you to move fast, and speed genuinely matters. But four of the eight activities are decisions, not actions — and a decision made wrong on day one is expensive to unwind on day five.
The preliminary determination in particular decides whether your floor comes out or stays. Getting it right is worth the twenty minutes it takes.
Step 1: the safety survey that comes before anything
A site-specific safety survey is the first required activity, and it is the one step you may have to handle yourself before anyone arrives.
Electricity and standing water
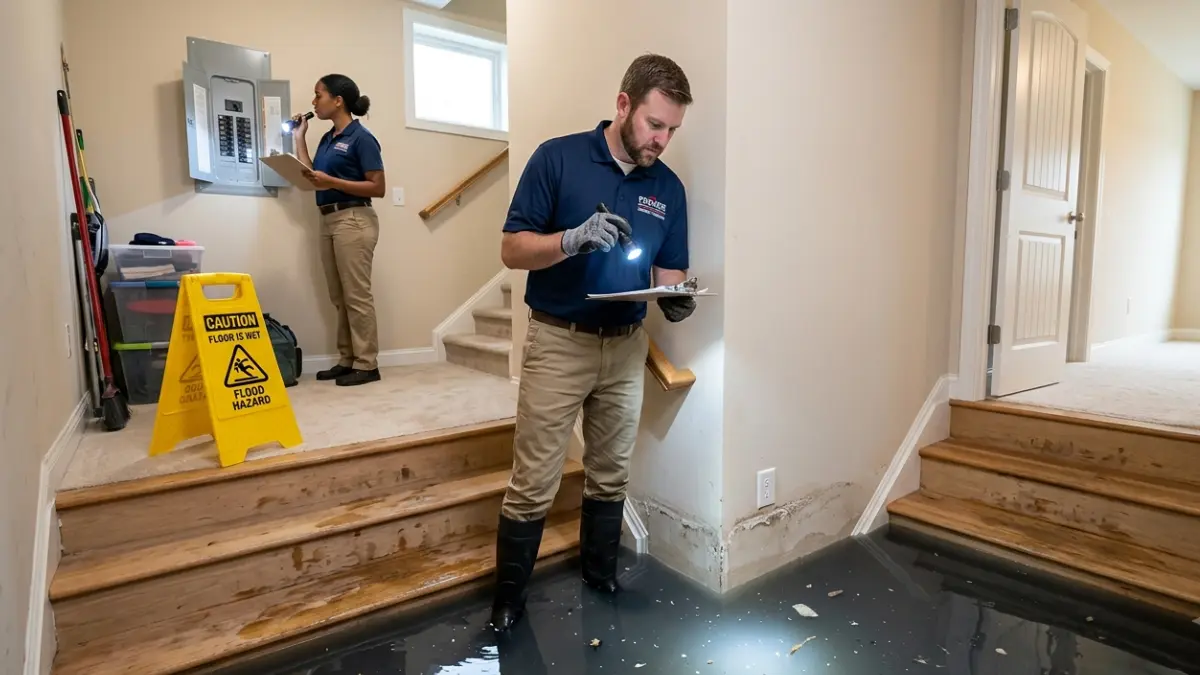
If standing water is anywhere near outlets, extension cords, plugged-in appliances, or the electrical panel, treat the area as energised until an electrician or the utility says otherwise.
Do not wade in to reach a breaker panel. Do not use a household vacuum on standing water.
We are deliberately not giving you a shut-off procedure here. If the panel is anywhere near water, the correct move is to call your utility or a licensed electrician and stay out.
⚠️ Watch Out: Water conducts electricity, and a basement or crawl space can hide an energised circuit under an inch of muddy water that looks harmless. Every year people are injured going back for possessions before power is confirmed off. If you cannot reach the panel from a dry position, you cannot reach the panel.
Ceilings that are holding water
Look up before you walk in. A ceiling that is sagging, bulging, or dripping from a single point is often holding pooled water above the drywall, and that weight comes down without warning.
Stay out of the room and call a licensed contractor or structural engineer. Puncturing it to “let it drain” is a technique for people with a plan for what lands.
Gas appliances and wetted HVAC
Water heaters, furnaces, and gas-fired appliances that have been submerged or splashed should be inspected before they are run again. The same goes for HVAC equipment and ductwork that took water.
If you smell gas at any point, leave the building and call your gas utility from outside.
What a site-specific safety survey covers when the crew arrives
A competent crew will walk the property before unloading anything. They are looking for electrical hazards, structural instability, contaminated water, biological hazards, and anything that makes the space unsafe to work in.
Ask what the survey found. Ask for it in writing, on day one rather than at settlement.
When not to go back inside at all
If the water came from a sewage backup, a river, storm surge, or any source you would not drink from, do not re-enter to salvage possessions until someone qualified has assessed it.
✅ Do This: Ask the responding crew two questions before they start: “Did you perform a site-specific safety survey, and what did it find?” and “Has the power to the affected area been confirmed off, and by whom?” Get both answers in writing. If the crew is not the party who confirmed the power, ask who was — a licensed electrician or your utility are the two acceptable answers.
Step 2: what you’re being asked to sign at the door
The second required activity is identifying your priorities and concerns. In practice, the first thing that happens is paperwork — and there are three different documents in circulation that most people cannot tell apart.
Why anyone wants a signature this fast
Restoration is an emergency trade. Crews mobilise before a claim is approved, sometimes before an adjuster has been assigned, and they need authorisation to work and a route to getting paid.
That is legitimate. It is also why a stressed person is asked to distinguish three legal instruments in about ninety seconds.
Work authorisation: what it is and what it isn’t
A work authorisation is a contract between you and the contractor. It says they may perform described work at your property and that you are responsible for the bill.
It is not an insurance document. Your insurer is not a party to it.
Direction to pay: the one most people think is something bigger
A direction to pay is a request you make to your insurer asking that the contractor be paid directly from your policy proceeds. The Restoration Industry Association’s own glossary defines it that way: a formal request, authorised by the named insured, that a third party be paid directly from the proceeds after a loss.
It routes money. It does not transfer your claim.
Assignment of benefits: the one that transfers your claim
An assignment of benefits, or AOB, transfers claim rights to a third party so that party can deal with your insurer directly. The Restoration Industry Association describes it as a contractual agreement letting a policyholder transfer claim rights to a service provider, who can then negotiate with the insurer for payment.
That is a different order of thing from the other two. The contractor steps into your position for billing purposes on that claim.
| Document | What it is between | What it transfers | Key detail |
|---|---|---|---|
| Work authorisation | You and the contractor | Nothing to the insurer | Establishes the work and your liability for the bill |
| Direction to pay | You, directed at your insurer | Payment routing only | Your claim stays yours |
| Assignment of benefits | You and the contractor | Claim rights on that loss | The contractor can negotiate with your insurer directly |
Definitions sourced from the Restoration Industry Association’s published glossary and its policymaker FAQ on assignment of benefits, and from state consumer guidance. Legal effect varies by state.
The industry’s own admission about these three
This is the part worth knowing. Writing in the Restoration Industry Association’s own publication, the association’s Restoration Advocate, attorney Ed Cross, has said that most restorers believe they hold an assignment of benefits when what they actually hold is a direction to pay.
If the people who write these forms routinely mix them up, nobody should expect a homeowner to sort them out under pressure.
🔍 Why It Works: The three documents look similar because they usually arrive stapled together on one clipboard, often as clauses inside a single contract rather than as separate pages. The distinction is not the paper — it is what each clause does. One creates a construction contract, one redirects a payment, and one transfers a legal position. Reading the headings is not enough; the assignment language is usually a paragraph inside the work authorisation.
What to say if you don’t understand the form
You are allowed to slow this down. A sentence that works:
“I’ll sign the work authorisation so you can start emergency work now. I’m not signing anything that assigns my claim until I’ve read it and spoken to my adjuster.”
Ask for a copy of everything you sign, at the time you sign it.
✅ Do This: Before signing, ask which of the three documents you are being handed and whether the contract contains an assignment clause. Then check your own state’s rules — assignment of benefits is treated very differently across states, and some generally decline to enforce it. Your state Department of Insurance consumer line will tell you free; a licensed public adjuster or an insurance-coverage attorney can review the actual form. We are not lawyers and this is not legal advice.
Step 3: finding and verifying where the water came from
The third required activity is verifying the source of water intrusion — which is a separate job from stopping it.
Stopping the water and verifying the source are two different jobs
“We stopped the leak” and “we know what leaked” are different sentences. Only the second one supports an insurance claim.
A shut-off valve stops the flow. It does not establish whether the failure was a burst supply line, a slow fitting leak, a failed appliance hose, or water that has been tracking down from the roof for a season.
The common sources and what each one implies
A burst pipe or a failed appliance supply line is usually a sudden event with a clear failure point. A roof leak may be sudden, or may be the visible end of months of intrusion.
A sewage backup or waste-line backflow is a contamination question before it is a plumbing question. Groundwater through a foundation is often a drainage problem that will recur.
The distinction matters because insurers separate sudden and accidental events from gradual or maintenance-related damage, and the two are treated very differently.
Why a wrong source call changes your whole claim
The source feeds directly into the category call in Step 5. It also feeds the coverage question, because the same finding that tells the crew how to scope the job tells the insurer whether to pay for it.
A written source report from a licensed plumber is one of the more useful documents you can obtain early. It should state the failure point, the nature of the failure, and the date discovered.
💡 Pro Tip: The S500 lists what a restorer should gather at first contact, and it is a longer list than most people expect: structure type and use, the source, date and time of intrusion, whether the source is under control, the general size of the affected area, known or suspected contaminants, history of previous water damage, the materials affected, and the age of the structure. If nobody has asked you any of that, the information gathering step is being skipped.
What to ask if nobody can find it
Sometimes the source is genuinely hidden — inside a wall cavity, under a slab, or behind a shower pan. Leak detection is its own specialty, and a restorer who cannot find it should say so rather than guess.
Ask what they have ruled out and what the next diagnostic step is. An honest “we don’t know yet, here’s how we’ll find out” is a better answer than a confident wrong one.
Step 4: how far the water actually travelled
The fourth required activity is identifying the extent of water migration. This is where most of the real damage is decided, because almost none of it is visible.
Why the wet patch you can see is the smallest part of it
Water moves through building materials by capillary action, and it moves sideways and upwards as well as down. A puddle on a kitchen floor can mean wet subfloor two rooms away and wet bottom plate inside a wall you have not looked at.
Drywall wicks. Insulation holds. A wall cavity can stay saturated for weeks behind a surface that feels bone dry to the hand.
Which is why “it looks fine now” is not a finding.
The tools a restorer uses and what each one can and can’t tell them
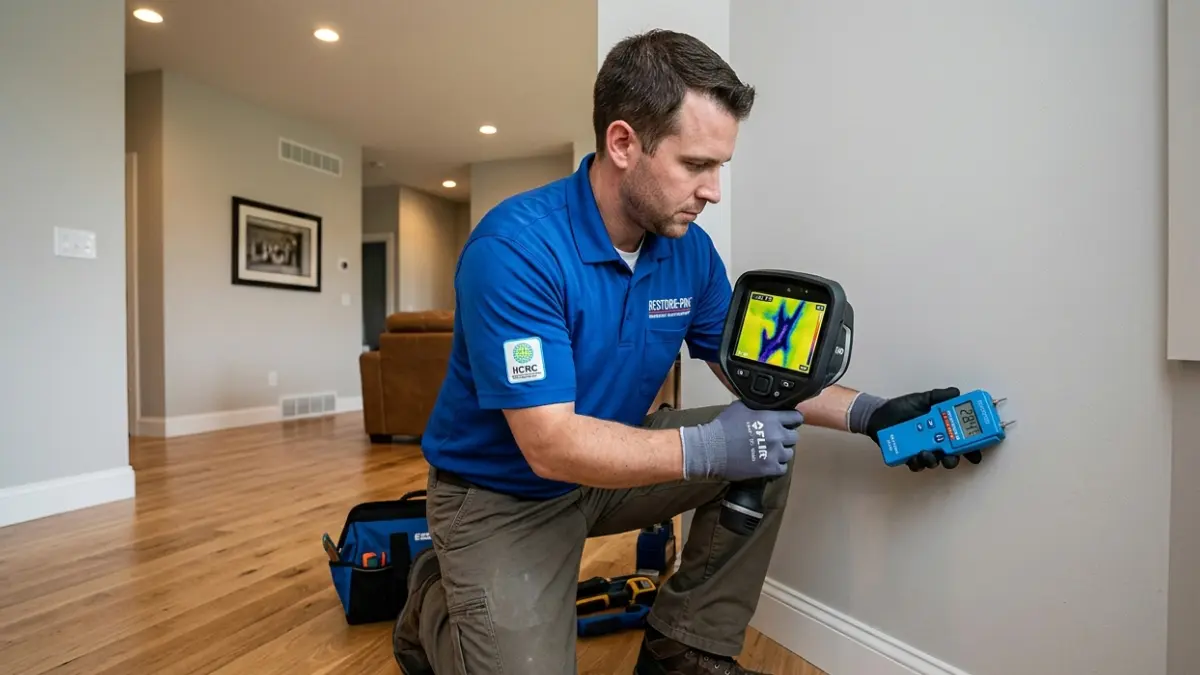
Three instruments do most of the work, and each answers a different question.
| Tool | What it actually tells you | Best for | Limitation |
|---|---|---|---|
| Moisture meter (pin) | Moisture content at a specific point and depth | Confirming and quantifying a suspected wet spot | Leaves small holes; needs correct species setting on wood |
| Moisture meter (pinless) | Relative moisture across a scanned area | Rapid screening of large wall and floor runs | Needs a flat surface; can read through to what’s behind |
| Thermal imaging camera | Surface temperature differences | Finding where to point a meter | Shows temperature, not moisture — evaporative cooling is inferred, not measured |
Tool behaviour sourced from published manufacturer technical documentation (Wagner Meters, Delmhorst, Protimeter). Gladewick did not test any meter for this article.
🔍 Why It Works: A thermal camera does not see water. It sees temperature, and wet material is usually cooler than dry material next to it because evaporation carries heat away. That is why a camera finds the area and a meter confirms it — a cold spot could equally be a draught, a pipe, or a missing patch of insulation.
Pin and pinless meters: what the numbers actually mean
On wood, a properly calibrated pin meter with the right species setting gives a moisture content figure that means something in absolute terms.
On drywall, plaster, and most other non-wood building materials, it does not. The meter still detects moisture — wetter material reads higher — but the number shown does not correspond to actual moisture content the way a wood reading does.
Manufacturers describe this as a relative reading, and it is the single most important thing to understand about this whole step.
Why a drywall reading is a comparison, not a measurement
If the number on a drywall reading is not absolute, a single reading tells you nothing. Forty means nothing on its own.
What means something is forty here and twelve on the same wall in a room the water never reached.
That comparison is the method. It is also, not coincidentally, exactly what the S500 describes for establishing a dry standard — read the same material in an unaffected area and work from there.
The baseline method: how to read your own walls
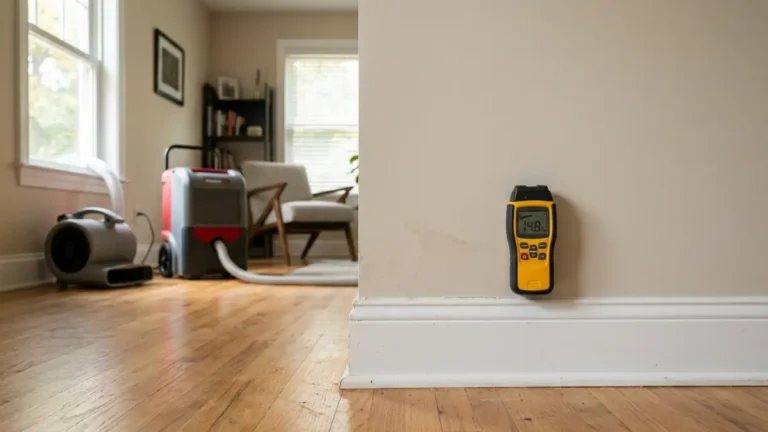
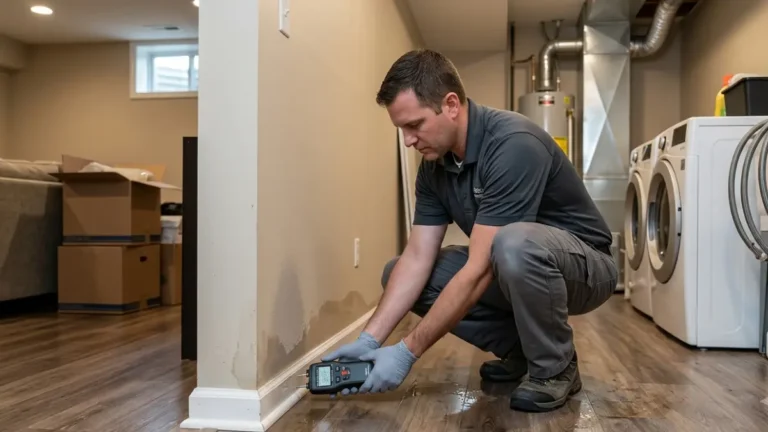
You can run a rough version of this yourself with an inexpensive consumer meter. It will not replace a restorer’s documented moisture map, and it should not be used to overrule a professional. What it will do is let you ask specific questions instead of vague ones.
- Find an unaffected area of the same material — the same drywall, on the same floor, in a room the water never entered. This is your baseline.
- Take three readings there, at the same height you will use elsewhere, and write down all three.
- Take readings in the affected area on a grid: at the baseboard, at knee height, and at waist height, every few feet along the wall.
- Record every reading with its location and the date and time. Readings without locations are not evidence.
- Repeat at the same points, at roughly the same time each day.
What you are watching for is not a magic number. It is whether affected readings are falling toward the baseline over successive days, and whether any point is not moving.
⚠️ Watch Out: A consumer meter is not a restorer’s instrument, and a homeowner reading is for orientation, not for adjudication. Two specific traps: metal corner bead and wiring inside a wall can make a pinless meter read high on perfectly dry drywall, and a reading taken at a different height or with different pressure is not comparable to the one before it. Use the same spots, the same height, and the same technique every time, or the log is worthless.
Building your own moisture log
A usable log has five columns: date and time, room, location on the wall, the reading, and a notes field for anything that changed — equipment moved, a window opened, the heating switched on.
Keep the baseline readings at the top of the sheet. Every other number on the page is only meaningful against them.
💡 Pro Tip: Ask your restorer for their moisture map and daily monitoring readings in writing, and keep your own log alongside it. You are not checking their arithmetic. You are creating a second, independent record of the same house on the same days — which is a materially stronger position than having no record at all if the drying is later disputed.
Step 5: which category of water you’re dealing with
The fifth required activity is the preliminary determination — establishing which category of water you have. It decides how much of your house comes out, and it is a judgement made by a person on your kitchen floor.
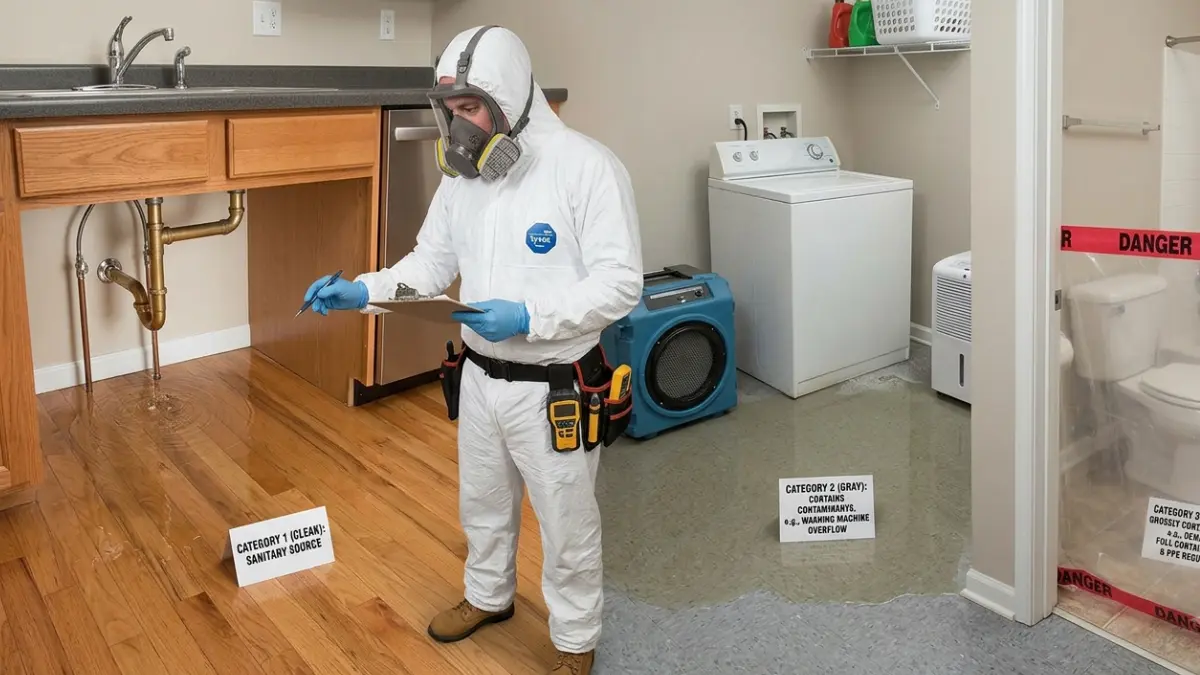
The three categories, and what each one means for your floor
The S500 defines three categories by degree of contamination, not by volume.
| Category | What it means | Typical sources | Key detail |
|---|---|---|---|
| Category 1 | Originates from a sanitary source; no substantial risk to people | Supply pipe burst, tub or sink overflow, appliance supply line, melted snow, rainwater, broken toilet tank | Drying can proceed without contamination controls |
| Category 2 | Significantly contaminated; could cause discomfort or illness on contact | Washing machine or dishwasher discharge, toilet bowl overflow without solids, some ground surface water | Remediation before restorative drying |
| Category 3 | Grossly contaminated; can carry pathogenic or toxigenic agents | Sewage, waste-line backflow from beyond a trap, seawater, rising river water, grossly contaminated weather-related water | Contamination controls and worker protection required |
Category definitions sourced from the ANSI/IICRC S500 Consensus Body Position Statement, February 2026, quoting Section B Definitions and Section 10.4.1 of the 5th Edition S500.
The practical consequence sits in the right-hand column. For a Category 1 loss, the standard says the restorer can proceed without containment barriers or pressure differentials. For Category 2 or 3, remediation should happen before restorative drying, and contamination controls and worker protection are required.
That is the difference between drying your floor and removing it.
Category and class are two different things — most guides get this wrong
This is the most common error on this topic, and it appears on pages that rank at the top of Google today.
Category describes contamination — how dirty the water is. Class describes evaporation load — how much water the materials are holding and how hard it will be to get out.
They are independent. A perfectly clean supply-line burst that soaked a whole floor is Category 1 and a high class. A small sewage backup contained to one bathroom is Category 3 and a low class.
If a page tells you that Class 4 means contaminated water, it has merged the two systems and you should discount the rest of what it says.
The four classes, in plain terms
Class is about how much material is wet and how readily that material will give the water back.
- Class 1 — the least water and the lowest evaporation load; minimal absorption into porous materials.
- Class 2 — a significant amount of water affecting a larger area, with wetting of porous materials.
- Class 3 — the greatest evaporation load, typically where water came from overhead and saturated ceilings, walls, insulation and flooring.
- Class 4 — deeply held or bound water in materials with low permeance and porosity: hardwood, plaster, concrete, masonry. The standard treats these as specialty drying situations.
We are not publishing the percentage thresholds that separate Class 1 from Class 2 and 3. Those figures circulate widely but trace only to secondary training material, and we have not been able to verify them against the current primary standard text. The concept holds regardless of where the exact lines fall.
Is storm water and wind-driven rain automatically Category 3?
No — and this is where the entire SERP has it wrong.
The Category 3 definition includes an example: contaminated water entering the indoor environment, such as wind-driven rain from hurricanes, tropical storms, or other weather-related events. Read quickly, that looks like a rule saying storm water is always Category 3.
In February 2026, the S500 consensus body published a position statement specifically to say it is not. Their reasoning turns on one word.
The standard’s own definitions section states that when the word can is used, it signifies an ability or possibility open to the user — a practice that is possible or capable of application, but is explicitly not a component of the accepted standard of care.
So the example is a possibility, not a requirement. The consensus body puts it plainly: top-down water ingress, wind-driven rain, and water from weather-related events are not automatically considered Category 3 water.
📊 Sourced: The position statement’s central point is that grossly contaminated water is the example, not wind-driven rain. Category 3 is defined as grossly contaminated; where water is not grossly contaminated, the example does not apply regardless of how the water entered the structure. Source: ANSI/IICRC S500 Consensus Body Position Statement, “Category of Water Damage and Weather-related Events,” 10 February 2026.
Why this matters to you: a Category 3 call means demolition, containment, and worker protection. If your loss is storm-related, the category should follow an inspection of what the water actually is — not an automatic classification based on where it came from.
That is a question you can now ask, with a document to point at. It is not grounds to overrule a restorer who has inspected and found genuine contamination.
Why clean water doesn’t stay clean
Category is not fixed at the moment of the leak. The standard is explicit that categories consider both the originating source and the water’s quality after it has contacted materials on the job site, and that time and temperature affect the amplification of contaminants.
Clean water sitting in a carpet, across an old subfloor, in a warm house, does not stay Category 1 indefinitely.
This is the honest argument for speed. Not that mould appears on a stopwatch, but that the category itself can degrade while you decide what to do.
Who makes this call, and what happens if you disagree
The preliminary determination is defined as a process performed by the restorer to establish the category of water in order to set a scope of work. It is their call to make.
The standard also sets out when someone else should be brought in. Where an inspection shows elevated risk, an indoor environmental professional should be retained by one of the parties — including where occupants are high-risk individuals, where a public health issue exists, where adverse health effects on workers or occupants are likely, where a suspected contaminant needs identifying, where contaminants are believed to have been aerosolised, or where there is a need to determine whether the water actually contains contamination.
That last one is the homeowner’s lever. If the category call is disputed and it hinges on whether the water is genuinely contaminated, the standard’s own answer is to have someone qualified determine it.
✅ Do This: Ask three questions before demolition starts: “What category did you assign?”, “What did you observe that supports it?”, and “Was an indoor environmental professional considered?” If mould is already visible rather than merely feared, that is a different process with its own standard — our mould remediation guidance covers what changes. For contaminated floodwater specifically, the EPA’s guidance on protecting indoor air quality during flood cleanup sets out the four actions to take, and Category 2 or 3 work needs an IICRC-certified restoration professional rather than a general handyman.
Step 6: separating new damage from old damage
The sixth required activity is identifying pre-existing damage — what was already wrong before this water arrived.
Why anyone bothers looking for old damage first
It sounds like a formality and it is not. A crew that documents the condition of the house on day one has a record; a crew that starts demolition without one is relying on memory when the adjuster asks what was already there.
That record can cut either way. It protects you from being blamed for damage that predates the loss, and it protects the insurer from paying for it.
The S500 also lists a history of previous water damage among the information a restorer should gather at first contact. If you know the basement has taken water before, say so — hiding it does not survive contact with a moisture meter.
What usually turns up
Old staining on a subfloor with dry readings. A previous repair behind new drywall. Rot at the base of a stud that predates anything that happened this week.
Wood damage in particular gets misattributed in both directions. Water damage, wood rot, and insect damage produce different patterns, and telling them apart matters — our guide to distinguishing termite damage from water damage and rot walks through what each one looks like.
How gradual damage gets a claim denied
Insurers separate sudden and accidental events from gradual or maintenance-related damage. A supply line that let go on Tuesday is one thing; a fitting that has been weeping behind a cabinet for two years is another.
This is why the date you first noticed the damage matters, and why writing it down matters more than remembering it.
⚠️ Watch Out: The most common version of this problem is not fraud. It is a homeowner who genuinely did not notice a slow leak, then discovers a sudden failure in the same area, and finds the whole claim characterised as long-term neglect. If there is any history at all, disclose it early and let the crew document the boundary between old and new. Discovering it at settlement is worse for you than raising it on day one.
What to do if you disagree with the call
Ask for the pre-existing findings in writing, with photographs, on the first day. If you think something has been mischaracterised as old, say so at the time rather than at the end.
A licensed public adjuster can review the finding if the amount at stake justifies it. So can your own contractor’s second opinion.
Step 7: what could go wrong in the next 48 hours

- Outstanding Performance: The 1800-watt motor delivers superior airflow into 6.6 gallons of usable wet or dry capacity, w…
- The Karcher Promise – Cleaner. Quicker: A top mount filter location means easy, sealed access to the filter without reci…
- Blower Function: The WD5/P’s built-in blower quickly moves dirt and debris from hard-to-reach areas with no need for a s…
The seventh required activity is identifying secondary damage concerns — the things that have not happened yet but will if nothing changes.
The 24 to 48 hour rule, and why it isn’t a rule
You have read that mould grows in 24 to 48 hours. That number is real and it comes from the EPA.
What almost nobody quotes is the sentence immediately after it.
What EPA actually says about drying inside the window
The EPA’s guidance is that in most cases, mould will not grow if wet or damp items are dried within 24 to 48 hours. That is the advice, and it is why speed matters.
But the EPA’s own cleanup table carries a footnote that cuts both ways. It states that even if materials are dried within 48 hours, mould growth may have occurred — and that mould growth will not always occur after 48 hours, because this is only a guideline.
📊 Sourced: Both halves of that caveat appear in Table 1 of the EPA’s Mold Remediation in Schools and Commercial Buildings, in the footnote beneath the material list. See the EPA’s Table 1: Water Damage — Cleanup and Mold Prevention and its Brief Guide to Mold, Moisture and Your Home.
What that means for you is practical rather than reassuring. Passing the 48-hour mark does not mean you have mould, and beating it does not mean you don’t. Either way, the next step is the same: get it dry, then look.
If mould is already visible, you are past prevention and into a different process. Our guide to what to do when mould appears after flooding covers where that goes.
Why you should not turn on fans yet
Almost every page on this topic tells you to set up fans immediately. The EPA’s table says something different, in one line: do not use fans before determining that the water is clean or sanitary.
The reason is straightforward. Moving air across contaminated material aerosolises what is in it and distributes it through the rest of the house.
🔍 Why It Works: A fan does not remove contamination — it removes moisture, and it does that by pushing air across a wet surface fast enough to carry water vapour away. Anything light enough to be lifted by that airflow goes with it: spores, bacteria, fine sediment from floodwater. On genuinely clean water that is exactly what you want. On Category 2 or 3 water, you have built a distribution system.
This is the clearest example of why the order of the eight steps matters. The category call in Step 5 is what tells you whether Step 7’s fans are safe to run.
Which materials come out, and which can be dried in place
The EPA publishes a material-by-material action list for clean-water damage. It is more decisive than most homeowners expect.
| Material | EPA’s action for clean water | Key detail |
|---|---|---|
| Ceiling tiles | Discard and replace | No drying option given |
| Fiberglass insulation | Discard and replace | Same for cellulose insulation |
| Wallboard (drywall) | May be dried in place if there is no obvious swelling and the seams are intact; otherwise remove, discard and replace | Ventilate the wall cavity where possible |
| Carpet and backing | Extract water, reduce humidity with a dehumidifier, then accelerate drying with fans | Subfloor beneath must also be cleaned and dried |
| Concrete or cinder block | Extract water, then dry with dehumidifiers, fans and heaters | Dense material, slow release |
| Upholstered furniture | Extract water, then dehumidify and warm | May not fully dry within 48 hours |
| Wood surfaces | Remove moisture immediately; dehumidify with gentle heat and fans | Use caution applying heat to hardwood floors; pry wet panelling away for drying |
| Books and papers | Photocopy what matters, discard originals, or freeze | Freezing buys time for valuable items |
Actions sourced directly from EPA Table 1, which applies to clean-water damage. Contaminated water changes the answer for most rows and requires PPE and containment.
Drywall: the decision everyone argues about
The row worth reading twice is wallboard. The EPA does not say all wet drywall must come out — it says drywall may be dried in place where there is no obvious swelling and the seams are intact.
Swelling and separated seams are the trigger for removal. Damp but sound is a candidate for drying.
That is a narrower rule than “it got wet, so it goes,” and it is worth asking about before a saw comes out. If drywall has already been removed and mould is in the picture, our guide to removing mould from drywall so it doesn’t come back covers the surfaces behind it.
When mould stops being a drying problem and becomes a remediation job
Visible growth, a persistent musty smell after the structure reads dry, or contaminated water in the first place all move this out of drying and into remediation, which has its own standard and its own containment requirements.
✅ Do This: If anyone in the household is an infant, is elderly, is recovering from surgery, is immune-suppressed, or has asthma or a severe allergy, raise it with the crew on day one and ask whether an indoor environmental professional should assess the property. Where mould is visible or suspected, get the assessment from someone who is not selling you the remediation — a certified mould professional or an IEP working independently of the restoration contractor.
Step 8: setting the dry standard and drying goal

- High Accuracy & Fast Refresh Rate: Temperature humidity gauge is equipped with a high-performance humidity temperature s…
- Easy-to-Read LCD: Room thermometer indoor mini hygrometer features a clear display with compact digits which allows you …
- Face Icon Comfort Indicator: Room temperature monitor dispalys three face icons which represent DRY/COMFORT/WET to visua…
The eighth and final required activity is establishing the dry standard and drying goals. This is the step that decides when the job is finished, and it happens at the beginning.
Dry standard and drying goal are two different things
A drying goal is the target moisture level the restorer intends to reach in a given material by the end of the job.
A dry standard is what that target is measured against: a reasonable approximation of the moisture content or level that material held before the water arrived.
One is the destination. The other is the map reference the destination is plotted from.
Where a dry standard actually comes from
The accepted method is to read similar materials in unaffected areas of the same building, or to use historical data for the region.
This is the same logic as the baseline method in Step 4, and for the same reason. There is no universal number for “dry drywall” because moisture content varies by material, by climate, by season, and by where in the building you are standing.
⚠️ Watch Out: Working from a canned list of dry standards rather than reading the actual building is a known failure mode in this trade. A sill plate in a humid Gulf Coast summer and the same sill plate in a Colorado winter sit at genuinely different moisture levels while both being perfectly dry. If a crew quotes you a target number without having read an unaffected area of your house, ask where the number came from.
We are deliberately not publishing a numeric tolerance for how close a drying goal must sit to the dry standard. Two figures circulate in the trade press — one expressed in percentage points of equilibrium moisture content, one as a percentage — and they come from different editions of the standard in different contexts. Neither could be verified against the current primary text, so publishing either would be inventing precision.
The method is the part that holds regardless.
Why “it feels dry” and “it reads dry” aren’t the same claim
A surface can feel completely dry while the material behind it is holding water. Hardwood, plaster, and concrete are particularly good at this, which is why the standard treats them as specialty drying situations.
Touch is not a measurement. Neither is the absence of a smell.
The one question to ask your restorer on day one
This is the single most useful sentence in this article:
“What dry standard did you set, from which unaffected material, and what’s the drying goal?”
A crew that knows what it is doing answers that in about fifteen seconds. A crew that cannot answer it has not performed the eighth activity, which means the job has no defined endpoint and the equipment comes out when someone decides it should.
💡 Pro Tip: Ask the question before the equipment goes in, not after. Setting a dry standard requires reading an unaffected area, and once air movers and dehumidifiers have been running for two days, the “unaffected” areas of your house are no longer unaffected. The baseline is genuinely harder to establish late.
What a monitoring log should show you
A usable monitoring record shows, for each day: the date, the materials read, the location of each reading, the reading itself, the temperature and relative humidity inside and outside the affected area, and any change to equipment.
Readings should be taken at the same points each day. A log that moves its measurement points around is not tracking progress; it is sampling different parts of a house.
What happens if nobody set one
Then “dry” becomes a judgement call made by the party who is paying to keep equipment on site. That is not an accusation of bad faith — it is a structural problem with having no defined endpoint.
If drying is later disputed, or if a smell returns weeks afterwards, the monitoring log is the evidence. If mould appeared despite a declaration that the structure was dry, post-remediation verification testing is how that gets settled independently.
What happens after the eight steps: drying begins
With all eight activities complete, structural drying finally starts. Here is what the next several days look like from inside the house.
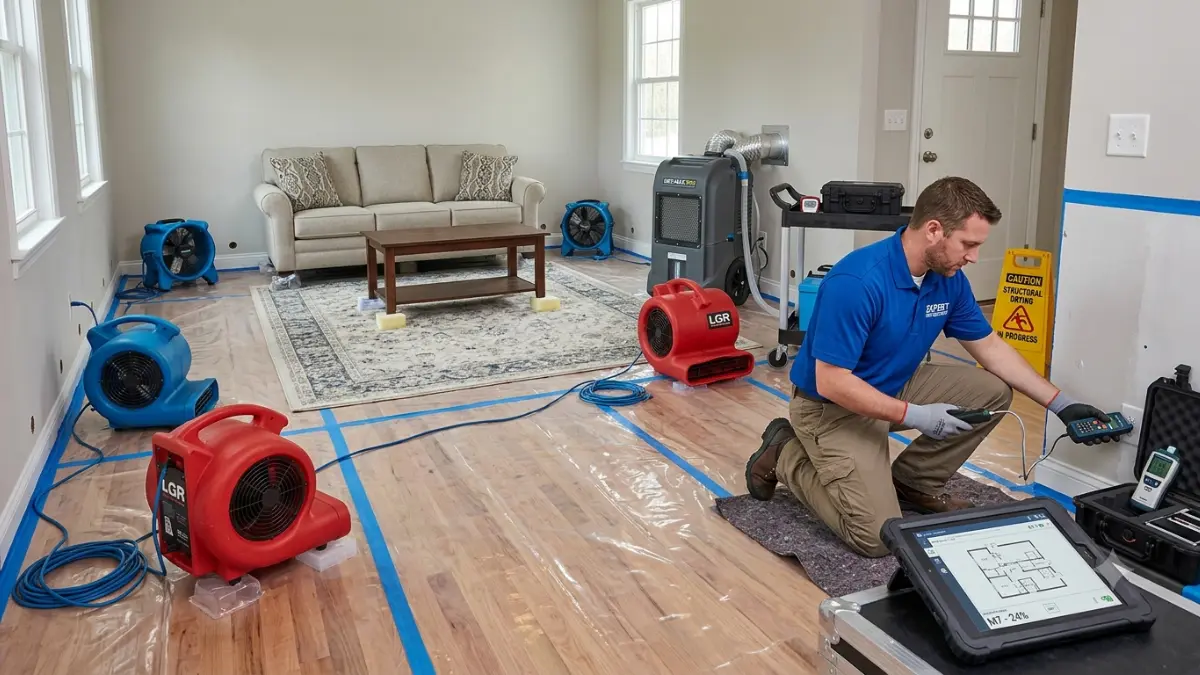
What the equipment does and why it’s noisy
Two machines do the work, and they do opposite halves of the same job.
Air movers push high-velocity air across wet surfaces to speed evaporation, lifting moisture out of materials and into the room air. Dehumidifiers then pull that moisture back out of the room air so the process can continue.
Running one without the other does not work. Air movers alone raise the humidity in a sealed room until evaporation stalls, which is why opening a window and pointing a box fan at a wet floor often achieves very little.
🔍 Why It Works: Drying is a transfer, not a disappearance. Water leaves the material, enters the air, and has to be removed from the air — otherwise the room reaches equilibrium and the wall stops giving up moisture. That is also why the doors are kept shut and why crews get irritated when they are opened: the drying chamber is a controlled environment, and every open door resets it.
How long drying actually takes
Ranges circulate widely — several days for drying, one to three weeks for repairs, a few weeks end to end for a whole job.
Those figures come from restoration companies describing their own work, not from the standard and not from any published dataset. We are repeating them as observed industry ranges because that is honestly what they are.
What actually drives the number is the class of damage, how deeply the water is bound into the materials, and the temperature and humidity the crew can maintain. A day-by-day view of how a related process unfolds is in our realistic remediation timeline.
What daily monitoring should look like
Someone should come every day. They should take readings at the same points, record temperature and humidity, check the equipment, and adjust placement if a material is not moving.
A crew that sets equipment on Monday and returns on Friday is not monitoring. Where readings show drying is not progressing, the standard’s expectation is that procedures and equipment placement are adjusted.
When drying ends and rebuild begins
Drying ends when the monitored materials reach the drying goals and that is documented — not when the calendar says so and not when the equipment is needed elsewhere.
Only then does rebuild start. If a contractor wants to close a wall before you have seen final readings, that is worth pausing over.
Living in the house while it dries
It is loud, warm, and disruptive. Many people stay; many cannot, particularly with Category 2 or 3 water or with vulnerable occupants in the household.
If you do leave, keep every receipt. That is a claim question, and it is covered below.
Documenting the loss without wrecking your claim

- 5200°F Fireproof & Water-resistant Safe: The upgraded important document organizer is made of thickened silicone-coated …
- Soft Box: Large-capacity(15″x11″x4.1″),Compared with other bags,our fireproof file organizer adopts a multi-layer design…
- Combination Lock Protection: Compared with other bags,our 5200°F fireproof document organizer can lock files and items i…
Documentation is the half of this process that happens on your phone, and it is where the single genuine contradiction in water damage advice lives.
Photograph before you touch anything
Before removing a single item, photograph and video everything: wide shots of each affected room, close-ups of the water line on walls and cabinets, damaged contents, the source itself, and the ceiling above.
Keep shooting throughout. Equipment placement, materials being removed, readings on a meter, and the state of a wall cavity once it is open are all things you cannot go back and capture.
Write down the date and time you first noticed the damage. That single fact does more work in a claim than most people expect.
Your duty to mitigate: what it actually requires
Most homeowners policies contain a duty to mitigate — an expectation that you take reasonable steps to prevent the damage from getting worse once you know about it. Stopping the water, extracting standing water, and tarping an opening are the classic examples.
Failing to act can reduce or defeat part of a claim. This is not controversial and every party in the process agrees on it.
The conflict nobody explains
Here is where the advice splits, and neither side tells you the other exists.
Restoration contractors and public adjusters will tell you to remove soaked drywall and carpet immediately, because mitigation is your obligation and delay costs money.
State insurance regulators say something else. New Jersey’s Department of Banking and Insurance, in its consumer guide to insurance and natural disasters, tells policyholders to check with their agent or insurance company before disposing of damaged items or starting repairs, because many companies want to inspect the damage first.
Both instructions are sound. Both are given by parties with a stake in the outcome. Follow either one exclusively and you have a problem.
A workable rule for what comes out and what stays
The resolution is sequencing, not choosing a side. Mitigation and disposal are different acts, and only one of them is urgent.
- Stop the water and make the area safe. Immediately, no exceptions.
- Extract standing water and protect what is not yet damaged. This is mitigation and it should not wait.
- Photograph everything before and during removal, including what is behind the material as it comes off.
- Remove saturated material where a qualified crew says it must come out — but do not dispose of it until it has been documented or the adjuster has seen it.
- Bag, label, and store removed material somewhere out of the way. A garage corner and a marker are enough.
- Make no permanent repairs until the adjuster has inspected, unless leaving it creates further damage.
✅ Do This: Call your insurer within the first day and ask one specific question: “Do you need to inspect the damaged materials before they are disposed of?” Get the answer and the name of the person who gave it. That single call collapses the contradiction for your specific policy and carrier, and a licensed public adjuster or your state Department of Insurance consumer line can help if the answer is unclear.
What to keep, and for how long
Keep removed materials until the adjuster has inspected or released them. Keep every receipt — emergency repairs, equipment rental, temporary lodging, meals if you have been displaced.
Keep the moisture log, the crew’s readings, every document you signed, and all written correspondence. Store it in one place, digitally if possible.
The paperwork trail that survives a dispute
The claim file that holds up is boring and complete: dated photographs, a written source report, the pre-existing damage findings, daily moisture readings, the signed authorisations, and a receipt for everything.
Most disputes are not about whether damage occurred. They are about scope, cause, and timing — which are exactly the three things a dated record settles.
What homeowners insurance covers, and where it stops
Homeowners insurance covers a great deal of water damage and pointedly excludes some of the most expensive kinds. The line falls in a place that surprises people.
Sudden and accidental versus gradual
The general shape of a standard policy is that sudden and accidental water damage from inside the home is covered — a supply line that bursts, an appliance hose that fails, a water heater that lets go.
Gradual damage generally is not. A slow leak that has been working behind a wall for months tends to be treated as a maintenance issue.
Policy language governs, and policies differ. Read your own declarations page rather than a summary of what policies usually say, including ours.
Where flood begins, and why your policy stops there
Water that arrives from outside and rises — surface flooding, storm surge, a river leaving its banks — is typically excluded from a standard homeowners policy entirely.
That is not a loophole; it is a market structure. Flood is covered through the National Flood Insurance Program or through private flood insurance, purchased separately.
The practical consequence is that two homes with identical visible damage can have entirely different coverage depending on which direction the water came from.
The NFIP, and the date on your calendar
The NFIP’s authority to issue policies runs on congressional reauthorisation rather than continuously, and it has been extended repeatedly in short increments.
FEMA’s own page on congressional reauthorisation of the NFIP states that legislation signed on 3 February 2026 extended the program’s authorisation to 30 September 2026, and that Congress must reauthorise it by 11:59 p.m. on that date.
If authorisation lapses, FEMA has said it would retain authority to pay valid claims with available funds, but would stop selling and renewing policies until reauthorisation. Policies already in force continue to the end of their term.
⚠️ Watch Out: If you are buying flood coverage, renewing it, or closing on a property in a flood zone, check the program’s current status directly with FEMA before you rely on a date printed anywhere — including here. This has lapsed before and been reauthorised retroactively, and the details of each lapse have differed.
Endorsements most people don’t know they can add
Several of the most common water losses sit outside a base policy and inside an endorsement you can buy: sewer and drain backup, sump pump failure, and in some cases mould coverage.
Our guide to when homeowners insurance covers mould remediation goes into how that last one is usually structured, because it is rarely unlimited.
Additional living expenses while you’re out of the house
If a covered loss makes the home uninhabitable, additional living expense coverage may reimburse temporary lodging and related costs. State consumer guidance is consistent on the mechanics: keep records and receipts for everything, and understand that if the loss is not covered, the expenses are not reimbursed either.
You don’t have to use the company your insurer suggests
This question deserves an honest answer about its sources rather than a confident one.
Every page we could find answering it is published by a restoration contractor — a party with a direct commercial interest in the answer being “no, use us instead.” That does not make them wrong, and the answer is broadly consistent with how policies are written: an insurer’s preferred vendor programme is a referral network, not a contractual requirement placed on you.
But we are not going to state it as settled fact on the strength of sources that all benefit from one answer. Ask your own carrier directly, and if the answer sounds like a requirement rather than a recommendation, call your state Department of Insurance and ask them.
What water damage restoration really costs
Restoration cost is the question everyone arrives with, and it is the one place in this article where the most useful thing we can do is refuse to give you a number.
Why we’re not giving you a national average
You have probably already seen one. There is a figure in the region of a few thousand dollars that appears across dozens of sites, presented as the national average cost of water damage restoration.
It traces back to lead-generation networks reporting on quotes submitted through their own platforms. That is not a national average; it is a sample of the jobs that arrive through one commercial channel.
More telling: one major aggregator publishes three different figures for the same metric across its own pages — three different averages and three different ranges, on the same site, in the same year. We are not going to launder that into a fact by repeating it.
📊 Sourced — what we can stand behind: The Insurance Information Institute’s published figures for homeowners losses over 2018–2022 show water damage and freezing at a claim frequency of 1.61 per 100 policies and a claim severity of $13,954, with roughly one in 60 insured homes filing such a claim each year. Note carefully what that number is: it is the average amount insurers paid per claim, including rebuild — not the cost of a mitigation job. Some outlets attribute a higher figure to a more recent window; that figure did not appear on the Institute’s live page at the time of writing, so we have quoted the window that did.
What actually drives the number
Four things move the bill more than anything else.
- Category of water. Category 1 may be dried. Category 2 and 3 require remediation before drying, containment, and worker protection — a different scope entirely.
- Class of damage. How much material is wet and how tightly it holds water determines how much equipment runs and for how long.
- Affected area. Not the size of the puddle; the square footage of material that actually took water, including inside walls and under floors.
- How long it sat. Time changes category, deepens saturation, and adds secondary damage.
Mitigation and rebuild are billed separately
This is the split from the opening section, and it is where most budget shocks come from.
Mitigation is extraction, equipment, monitoring, and any demolition needed to dry the structure. Rebuild is drywall, flooring, paint, trim, and cabinetry.
An estimate for one is not an estimate for both. Ask explicitly which you are being quoted, and get an itemised scope in writing before work starts.
What we can tell you honestly
Get itemised written estimates from more than one company. Ask what is charged per day and what is charged once. Ask how many pieces of equipment, for how many days, and what happens to the price if drying takes longer than estimated.
That produces a real number for your house, which is worth more than any average for a house that is not yours.
Where the published averages come from
If you want to use the published figures at all, use them the way they should be used: as a very rough sense of scale, from a commercial sample, for a mixture of mitigation and rebuild work of unknown composition.
Not as a target. Not as evidence that a quote is too high. And not as a budget.
How to check a restoration company before you sign
Vetting a restoration company is easier than it looks, because the standard itself supplies the questions.
What IICRC certification is and what it isn’t
The IICRC is the body behind the S500 standard, and it certifies individual technicians and firms in water damage restoration and applied structural drying.
It is a genuine and relevant industry credential. It is not a licence, it is not issued by a government, and it does not substitute for whatever contractor licensing your state requires.
Look for both. One tells you they were trained in this specific work; the other tells you they are legally permitted to do business as a contractor where you live.
Verifying a licence, and where
Contractor licensing is administered at state level, usually by a state licensing board or department of consumer affairs, and most maintain a free public lookup.
Search for your state’s contractor licence lookup and check the licence number the company gives you against it. Confirm it is active, in the right classification, and in the company’s actual legal name.
Ask for a certificate of insurance, including general liability and workers’ compensation, sent directly from their insurer rather than as a photocopy.
The eight questions drawn from the standard
Every question below maps to one of the eight required initial-response activities. They take about five minutes to ask.
- Did you perform a site-specific safety survey, and what did it find?
- What have you recorded as my priorities and concerns for this job?
- Have you verified the source of the intrusion, and will I get that in writing?
- How did you determine the extent of water migration, and can I see the moisture map?
- What category of water did you assign, and what did you observe that supports it?
- What pre-existing damage did you document?
- What secondary damage concerns did you identify?
- What dry standard did you set, from which unaffected material, and what is the drying goal?
What a good answer sounds like
Specific, quick, and reference-able. “Category 2, because the water came through the washing machine discharge line and had been sitting about eighteen hours — here’s the moisture map” is a good answer.
“We’ll know once we get in there” is acceptable on day one for some of these. “We don’t really do it that way” is not.
Most competent restorers will answer all eight without hesitation and will not mind being asked. The questions are not an accusation; they are the job description.
Warning signs at the door
Pressure to sign immediately without reading. Reluctance to provide an itemised written scope. An unwillingness to say what category was assigned or how.
Also: anyone who arrived without being called, particularly after a widespread weather event.
Getting a second opinion mid-job
You are allowed to bring in another opinion partway through. The vetting logic transfers across trades — our guide to finding a remediation company you can actually trust covers the same verification steps for the mould side.
Common questions about the restoration process
1. Should I turn off the power after water damage?
If standing water is near outlets, cords, appliances, or the electrical panel, power to that area should be off before anyone enters. Do not wade through water to reach a breaker panel. If you cannot reach the panel from a completely dry position, call your utility or a licensed electrician and stay out of the area until one of them confirms it is safe.
2. Can I dry it myself with fans after water damage?
Only after you know the water is clean. The EPA’s guidance says not to use fans before determining that the water is clean or sanitary, because moving air across contaminated material spreads what is in it through the house. For genuinely clean water in a small area, fans plus a dehumidifier are appropriate. For anything involving sewage or floodwater, call a certified restoration professional.
3. Does drywall always have to be removed after water damage?
No. The EPA’s material guidance says wallboard may be dried in place where there is no obvious swelling and the seams are intact, and should be removed and replaced where it is swollen or the seams have failed. Ventilating the wall cavity helps where that is possible. Ask which condition applies to your walls before demolition begins.
4. Is rain water automatically Category 3?
No. The S500 consensus body published a position statement in February 2026 stating that top-down water ingress, wind-driven rain, and weather-related water are not automatically Category 3. The standard’s Category 3 example turns on the word “can,” which its own definitions describe as a possibility rather than a component of the standard of care. Grossly contaminated water is the example — not wind-driven rain by itself.
5. What is the difference between a category and a class of water damage?
Category describes contamination: how dirty the water is, on a scale of one to three. Class describes evaporation load: how much material is wet and how tightly it holds water, on a scale of one to four. They are independent of each other. A clean burst pipe soaking a whole floor is Category 1 and a high class. Any guide that defines Class 4 as contaminated water has merged the two systems.
6. How do I know if my house is actually dry?
By comparing readings against a dry standard, not by touch. The restorer should have set a dry standard at the start by reading the same material in an unaffected area of your house, then set a drying goal against it. Ask for the daily monitoring log showing readings at consistent points over time. A surface that feels dry can sit above material that is still holding water.
7. How long do the fans have to stay on after water damage?
Until the monitored materials reach the documented drying goals — not until a fixed number of days has passed. Industry sources commonly describe several days for drying on typical residential losses, but those ranges come from restoration companies describing their own work rather than from the standard. Where readings show drying has stalled, equipment placement should be adjusted rather than the clock simply run longer.
8. Can I throw damaged items away before the adjuster sees them?
Generally no. State insurance regulators advise checking with your insurer before disposing of damaged items or starting repairs, because many carriers want to inspect first. You still have a duty to mitigate, so removing saturated material to stop further damage is appropriate — but photograph it, then bag and store it rather than discarding it. One call to your carrier settles this for your specific policy.
9. Do I have to use the restoration company my insurer suggests?
A preferred vendor programme is generally a referral network rather than a requirement, and the industry consistently says you may choose your own contractor. We flag one caveat honestly: nearly every published source answering this question is a restoration contractor with a commercial interest in that answer. Confirm it with your own carrier, and call your state Department of Insurance if the answer sounds like an obligation.
10. What is an assignment of benefits?
An assignment of benefits transfers your claim rights on a specific loss to a third party — usually the contractor — so they can deal with your insurer directly. It is different from a direction to pay, which only routes payment and leaves the claim with you, and from a work authorisation, which is just a contract to perform work. Its legal effect varies significantly by state; have the actual form reviewed before signing.
11. Does homeowners insurance cover a burst pipe?
Sudden and accidental water damage from inside the home, including a burst supply pipe, is generally covered under a standard policy, while gradual leaks are generally treated as maintenance and excluded. Water arriving from outside and rising is usually excluded entirely and falls to separate flood coverage. Your own policy language governs, so read the declarations page rather than any general summary.
12. What if mould appears after the house was declared dry?
That points to either incomplete drying or a moisture source that was never resolved. The monitoring log is the evidence — it shows which materials were read, where, and what they read on the final day. Independent post-remediation verification testing can settle whether the structure genuinely reached its drying goals. Have the assessment done by someone who is not selling you the remediation work.
Your next step, tonight

- 【1-Second Rapid Detection and Response & Dual-Side Sensing】Featuring six highly sensitive sensor probes, Tapo T300 trigg…
- 【Instant App Notifications】Receive an instant app notification when a leak happens or the batteries run low. Find out ev…
- 【90 dB Built-in Alarm】Alerts you immediately with its adjustable 90 dB alarm when leakage occurs. Press once to silence …
If you have read this far, you are probably somewhere in the first two days of this, tired, and holding more information than you wanted about a subject you never chose. That is a reasonable place to be, and the situation is more manageable than it feels right now.
The one thing to do before you go to sleep
Take the photographs. Every affected room, wide and close, the water line on the walls, the source, the ceiling above, and anything already removed.
That is the one thing that becomes impossible to do later and that nobody can do for you.
The single most important thing to verify
Before demolition begins, get the category call in writing along with what was observed to support it. That one decision determines how much of your house comes out, and it is easier to question before the saw comes out than after.
If anyone in your household is an infant, elderly, immune-suppressed, or has asthma, ask on day one whether an indoor environmental professional should assess the property — and get that assessment from someone who is not selling the remediation.
Where to go next
Three things are likely to come up in the next fortnight:
- If mould does appear in a basement afterwards, our guide to basement mould removal covers the surfaces and the method.
- If you are trying to stop this recurring, how a dehumidifier prevents mould explains what that equipment can and cannot do once the emergency is over.
- And if growth has already started, what to do when mould appears after flooding is the next read.