Mold Remediation Guidance for Your Exact Situation
Mold remediation decisions start with one question most homeowners skip: is the affected area above 10 square feet? Everything flows from that answer.
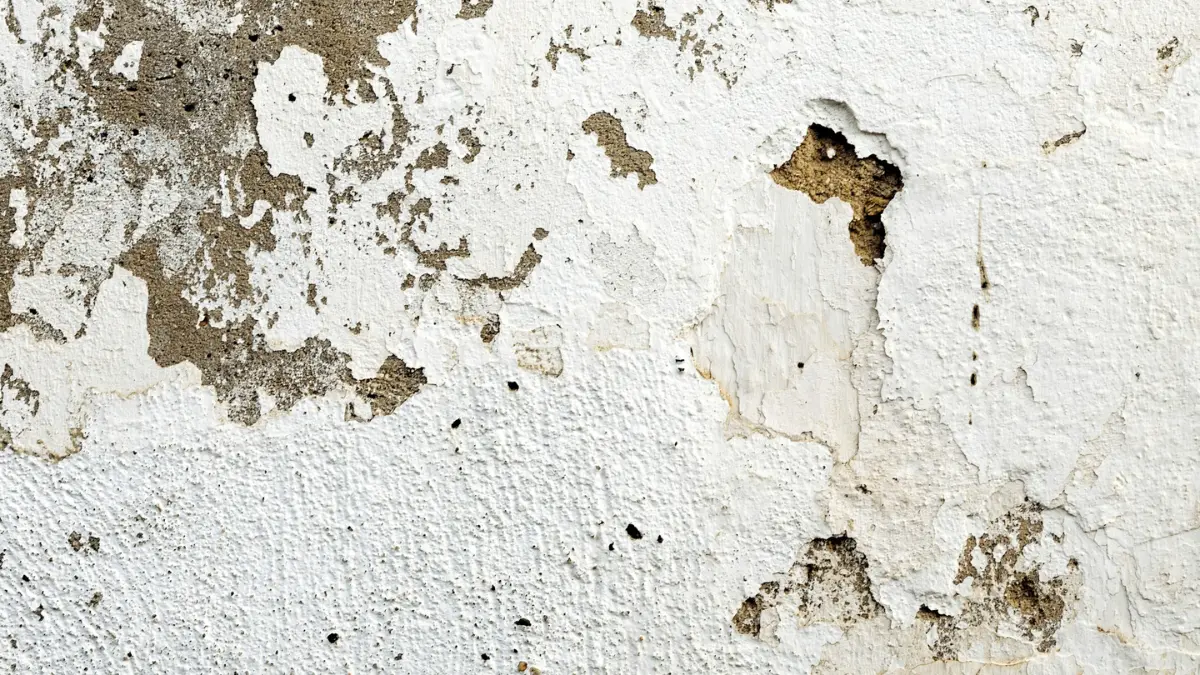
Table of Contents
Mold in your home: what you’re dealing with and what to do first
You found something — and now you need to know exactly what to do about it.
Maybe it was a dark patch spreading across the corner of your bathroom ceiling. Maybe it was the smell — that distinctive earthy, basement-floor dampness rising from a wall that should have no reason to smell like anything. Maybe you pulled back the carpet near your sump pump and what you saw stopped you cold.
Whatever brought you here, you are dealing with a mold problem, and the first thing you need to know is this: finding mold is alarming, but it is not a crisis.
Millions of US homeowners deal with mold every year. The vast majority resolve it completely. What determines the outcome is not the mold itself — it is whether you respond to it correctly.
This guide follows EPA and CDC guidelines throughout and has been reviewed by Patricia Walsh, CMI, a Certified Mold Inspector with fourteen years of residential inspection experience. By the time you finish reading the section that applies to your situation, you will know exactly what you are dealing with, exactly what to do about it, and exactly what success looks like.
⚠️ Warning: Before you do anything else, apply these three rules. Do not turn on your HVAC system if you suspect mold is near or inside any ductwork — running the system distributes spores through every room. Do not disturb visible mold without proper respiratory protection — an N95 or better respirator is the minimum. If anyone in your household has a respiratory condition, compromised immunity, or is under 12 years old, read Section 5 on health effects before you begin any assessment.
How to use this guide: finding your situation in 60 seconds
This is a long article by design — because mold remediation is not a simple topic and every reader arrives in a different situation.
Rather than making you scroll through sections that do not apply to you, use the diagnostic router below to go directly to the content that matches your specific circumstances. The router works in one pass.
Diagnostic router: what kind of mold problem do you have?
Answer each question and follow the routing logic to your section.
Question 1 — How large is the visible mold area?
- Less than 10 square feet (roughly a 3×3 foot patch): continue to Question 2.
- More than 10 square feet, or you cannot identify the full extent: go directly to Section 9 (Professional Remediation) and Section 10 (Costs).
Question 2 — Where is the mold located?
- On a surface — tile grout, drywall paint, a wood shelf, a window frame: continue to Question 3.
- Inside a wall cavity, in structural framing, in HVAC ductwork, or you cannot see the full extent: go directly to Section 9.
Question 3 — Does anyone in your household have asthma, a respiratory condition, compromised immunity, or is anyone pregnant?
- Yes: go to Section 5 (Health Effects) first, then Section 9 (Professional Remediation).
- No: continue to Question 4.
Question 4 — Has this area had mold before that was cleaned and returned?
- Yes: go to Section 6 (Moisture Source) — you have not resolved the root cause.
- No: continue to Question 5.
Question 5 — Is the affected material porous (drywall, wood, insulation, carpet) or non-porous (tile, glass, metal, sealed paint)?
- Porous material: go to Section 7 (DIY vs. Pro Decision) to determine whether material removal is required.
- Non-porous material: you are likely a candidate for DIY surface treatment — start with Section 8.
Quick safety rules before you do anything else
Three things to act on immediately — before any assessment, any cleaning, and any contractor calls.
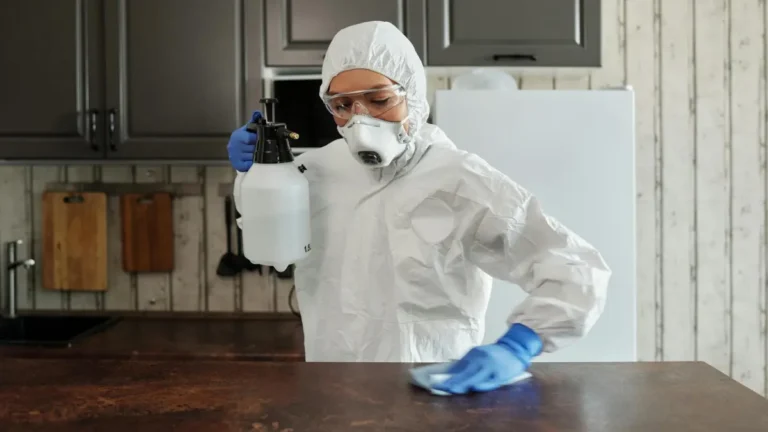
Rule 1 — Do not disturb mold without respiratory protection. Touching, scrubbing, or vacuuming mold without a properly fitted N95 or P100 respirator releases a concentrated cloud of spores directly into your breathing zone.
Rule 2 — Identify and stop the moisture source. Mold cannot survive without a continuous or recent moisture supply. Any remediation that does not also resolve the moisture source will result in regrowth within weeks.
Rule 3 — Document everything before you disturb anything. Take photographs of every affected area before any cleaning or removal begins — dated, sized, located. This documentation protects you in insurance claims, landlord-tenant disputes, and real estate transactions.
At Gladewick, every guide we publish starts from the same principle: you deserve complete, accurate information that serves your interests — not the interests of a contractor referral network or a product sponsor.
What mold remediation actually means for homeowners
Most homeowners arrive at this topic thinking remediation is a fancy word for cleaning — and that misunderstanding is how a $500 bathroom tile problem becomes a $4,000 drywall replacement.
Mold removal vs. mold remediation: why the difference matters
Mold removal and mold remediation are two fundamentally different things, and the distinction matters more than most homeowners realize.
Mold removal refers to physically cleaning visible mold from a surface. Mold remediation is the broader process of addressing the full scope of a mold problem: identifying the extent, containing the spread, removing affected materials where necessary, treating remaining surfaces, eliminating the moisture source, and verifying through testing that normal mold conditions have been restored.
Removal treats the symptom. Remediation treats the cause.
Here is why that distinction matters in practice. A homeowner who scrubs dark discoloration off bathroom tile with bleach has removed visible mold. But if the moisture causing that mold — inadequate ventilation, a slow pipe leak, failed grout allowing shower water into the wall cavity — has not been resolved, the mold will return within two to four weeks.
The surface looks clean. The problem is not solved.
What the EPA says about acceptable mold levels in a home
One of the most persistent misconceptions about mold is that the goal of remediation is to eliminate all mold from a home entirely.
This is neither achievable nor necessary. According to the EPA’s mold remediation guidance for buildings, mold spores are present in virtually every indoor environment at trace levels — they enter through doors, windows, HVAC systems, and on clothing and shoes.
The goal of remediation is not zero mold. The goal is returning indoor mold levels to the concentrations typically found in clean outdoor air in your region and season.
This matters because it sets a realistic, achievable standard. Your remediator — whether that is you or a professional — is working toward a measurable outcome, not an impossible standard of sterility.
Why bleach alone doesn’t solve a mold problem
The bleach myth is embedded deeply in American home maintenance culture. It is also wrong — specifically when applied to porous surfaces, which is where mold problems most commonly occur.
Here is the chemistry. Bleach (sodium hypochlorite) is highly effective at killing mold on non-porous surfaces like tile, glass, and sealed metal — it penetrates the thin biofilm, kills the mold cells, and leaves a residual that inhibits immediate regrowth.
The problem is porous materials. When you apply bleach to drywall, wood, grout, or concrete, the hypochlorite ion — the active killing ingredient — is too large to penetrate the surface.
It stays on top and kills surface cells. But the water carrier in bleach penetrates deeply into the porous material, introducing additional moisture to a space that mold was already using as a food and moisture source.
The surface turns white. The mold in the material’s interior continues to grow.
This is not a hypothetical — standard mold remediation protocol for porous materials requires physical removal of the affected material, not surface treatment. You cannot bleach your way through a mold problem in drywall.
The remediation goal: returning to normal fungal ecology
The professional remediation standard — established in the IICRC S520 standard — describes successful remediation as returning the indoor environment to “normal fungal ecology.”
This means mold species diversity and spore concentrations consistent with the clean outdoor baseline for your geographic region and season. Understanding this goal changes how you think about the process.
You are not trying to sterilize your home. You are trying to eliminate the abnormal indoor mold growth that resulted from a moisture event, restore conditions in which mold cannot sustain itself, and verify through testing that you have succeeded.
Every step in this guide is oriented toward that specific, achievable outcome.
How to identify mold in your home: the full diagnostic
Knowing you have a mold problem and knowing the full extent of a mold problem are two different things — and most homeowners who call a remediation contractor have been living with mold longer than they realize.
The eight signs your home has a mold problem
These are the most reliable indicators of an active mold situation in your home, in descending order of reliability.
- Visible discoloration on walls, ceilings, or floors — the most obvious indicator, appearing as black, green, white, or gray patches that spread or cluster in damp-prone areas.
- A persistent musty, earthy odor in a room even after cleaning — mold produces microbial volatile organic compounds (MVOCs) that create a distinctive smell detectable before any visible growth appears.
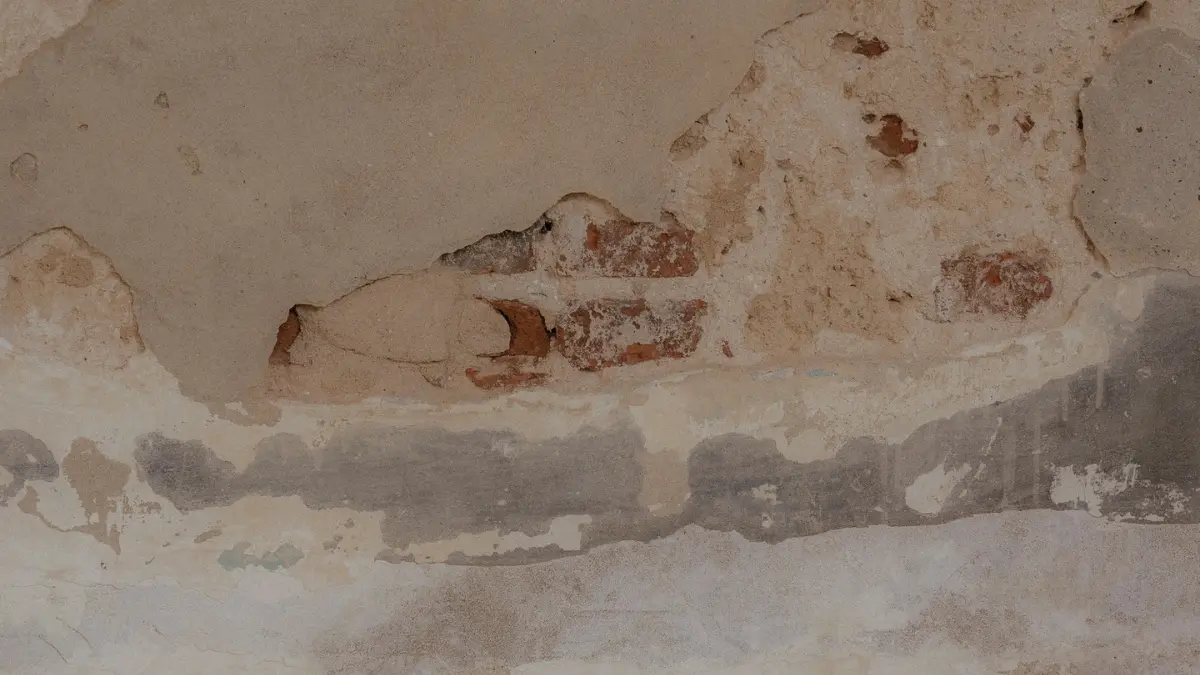
- Water stains or discoloration on ceilings, walls, or around window frames that indicate past or ongoing moisture intrusion, even without visible mold present yet.
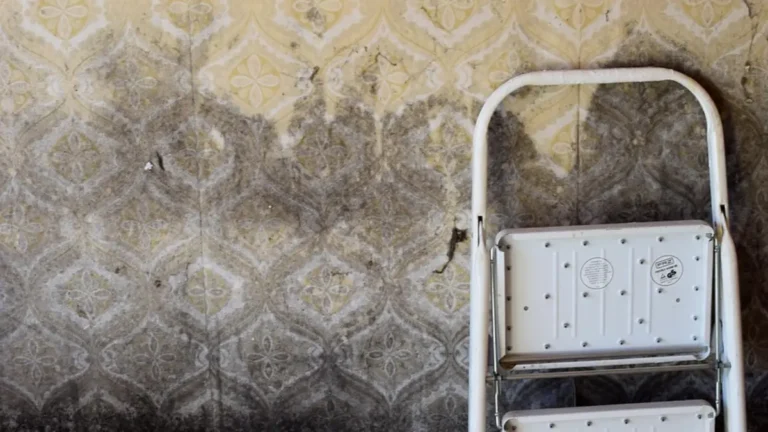
- Peeling, bubbling, or warping paint or wallpaper — moisture migrating through a wall from mold growth behind the surface causes paint failure even when the painted surface appears clean.
- Unexplained respiratory symptoms in household members that improve when they leave the home and return when they come back — this pattern strongly suggests an indoor air quality issue.
- Condensation on windows or cold surfaces during cooler months, indicating indoor relative humidity is elevated above 60% — the threshold above which mold thrives.
- Grout discoloration in bathroom or kitchen tile that returns to dark coloring shortly after cleaning, suggesting mold growth within the grout or behind the tile substrate.
- A history of flooding, water intrusion, or slow leaks in the previous 12 to 24 months — mold can remain dormant in dried materials and reactivate when humidity rises.
The presence of two or more of these signs is sufficient reason to proceed with a full investigation.
How to tell mold from mildew, dirt, and efflorescence
Not every discoloration in your home is mold — confirming you are dealing with mold before beginning any remediation saves time, money, and unnecessary chemical exposure.
Mildew is a surface fungal growth that appears as flat, powdery discoloration — typically white, gray, or yellow — on organic materials like fabric, paper, and plant leaves. It stays on the surface and does not penetrate into the material. A stiff brush and a surface cleaner typically remove it without any remediation protocol.
For a complete visual breakdown of every distinction between these two growths, see our guide on the difference between mold and mildew in your home.
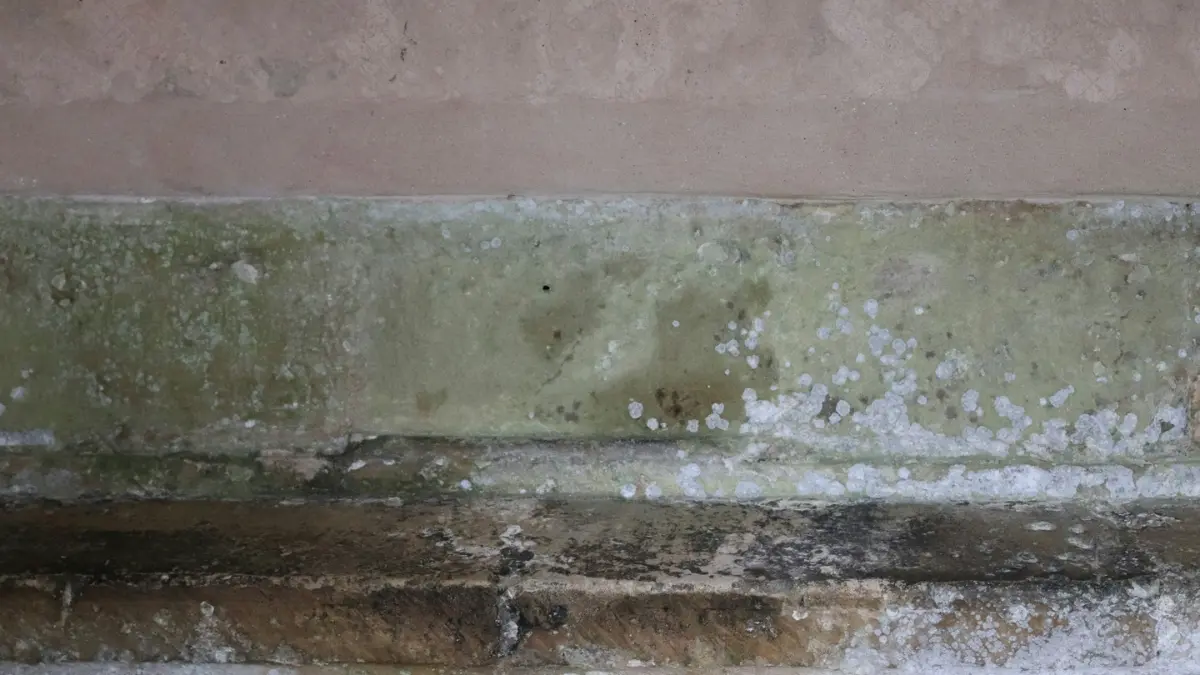
Efflorescence is a white, powdery mineral deposit on concrete, brick, or masonry surfaces. It forms when water moves through masonry and deposits dissolved salts on the surface as it evaporates. It is not biological, not a health risk, and is cleaned with dilute acid or a wire brush — not antimicrobial treatment.
The key distinction: efflorescence is always white and powdery; mold on concrete can be white but typically has a fuzzy or slimy texture and produces a smell.
Dirt and soot accumulate in corners, behind furniture, and at the base of walls and can visually resemble mold clusters. The test: apply a drop of household bleach to the discolored area. If it lightens within one to two minutes, you are likely looking at mold. If it does not change, it is likely dirt, soot, or staining.
Where mold hides: the 12 locations homeowners miss
Every professional mold inspector knows that visible mold is rarely the whole problem — these twelve locations account for the majority of hidden mold discovered during professional inspections in US residential buildings.
- Behind the refrigerator drip pan — condensation pools in the pan and on the floor beneath it chronically; pull your refrigerator forward and inspect underneath at least annually.
- Inside window weep holes and sill channels — the drainage channels at the base of window frames trap organic debris and moisture; probe with a flashlight and a toothpick.
- Beneath carpet on concrete slab foundations — concrete is never fully vapor-impermeable; moisture migrates upward and is trapped beneath carpet padding, creating mold in a space you cannot see without pulling back the flooring.
- Inside HVAC supply and return duct elbows — particularly in systems where condensation forms on the duct exterior in humid climates; a flashlight inspection of accessible duct sections reveals accumulation.
- Behind bathroom exhaust fans — the fan housing itself is a chronically humid environment; remove the cover annually and inspect the housing interior with a flashlight.
- In the wall cavity behind a shower enclosure — even well-maintained tile showers develop grout failure over time; water migrates through failed grout into the wall cavity and colonizes the paper facing of drywall behind it.
- In attic space above bathroom exhaust fans ducted into the attic rather than through the roof — this installation error is common in homes built before 2000 and creates ideal condensation conditions on roof sheathing.
- Under kitchen sinks — pipe sweating, slow drain leaks, and dishwasher drain hose drips create chronic moisture in enclosed cabinet spaces that go unnoticed for months.
- In crawl space insulation — faced fiberglass batts installed between floor joists trap moisture on their vapor barrier face; inspect by lifting sample sections during your annual crawl space check.
- Behind baseboards at exterior walls — thermal bridging at wall framing creates cold spots that attract condensation inside the wall cavity; press the back of your hand against exterior wall baseboards during cold weather and feel for unusual coolness.
- In the interstitial space between a tub surround and the framing behind it — fiberglass and acrylic tub surrounds flex slightly with use; the caulk at the tub-to-wall joint fails and allows water behind the surround.
- Inside furnace air handlers and evaporator coil pans — the evaporator coil is a chronically wet surface during cooling season; the condensate pan beneath it accumulates standing water that grows mold distributed through the duct system during every operating cycle.
Use a moisture meter — a device available for $15 to $90 — to identify elevated moisture content in walls, floors, and ceilings without breaking the surface. Readings above 20% in wood or 17% in drywall indicate a moisture condition that warrants investigation.
How to assess severity: the 10-square-foot rule and beyond
The EPA’s residential guidance establishes 10 square feet — roughly a 3×3 foot area — as the threshold above which professional remediation is recommended for homeowners without professional training.
Below that threshold, properly equipped and informed homeowners can typically perform safe, effective remediation themselves. But the 10-square-foot rule is a starting point, not a complete framework.
The location and material of the mold growth matter as much as the area. Ten square feet of surface mold on bathroom tile is a very different problem from ten square feet of mold on drywall — the drywall almost certainly requires material removal, not surface treatment.
Use this three-part severity assessment before making any remediation decision:
- Area — Measure the visible mold growth. If it exceeds 10 square feet, proceed as if professional help is required until a professional opinion confirms otherwise.
- Material — Determine whether the affected material is porous (drywall, wood, insulation, carpet, ceiling tile) or non-porous (tile, glass, sealed metal, sealed concrete). Porous materials require removal. Non-porous surfaces can be cleaned and treated.
- Location — Determine whether the mold is confined to a surface or has penetrated into cavities. Tap the wall surface around the affected area — a hollow sound indicates a cavity that may hold mold beyond what is visible.
When to stop looking and start calling
There is a point in every mold investigation when the right decision is to stop the DIY assessment and call a Certified Mold Inspector (CMI).
That point arrives when: you cannot identify the boundaries of the mold growth; you find mold in multiple unconnected locations; any visible mold is accompanied by structural softness; or your moisture meter readings are elevated throughout a large area without a clear moisture source.
A CMI will perform air sampling and surface testing, identify the full extent of growth including behind finished surfaces, and provide a written assessment that documents the problem and defines the remediation scope. This costs between $300 and $600 in most US markets — and it is the most valuable investment you can make before committing to a remediation approach.
Types of household mold: what you’re actually looking at
Understanding what type of mold you are dealing with changes the urgency of your response, the testing required, and in some cases the remediation approach — you do not need to become a mycologist, but you need enough working knowledge to interpret what you are seeing.
💡 Expert Note: The species descriptions below reflect professional mold inspection standards and were reviewed by Patricia Walsh, CMI. Visual identification of mold species is not reliable — confirmatory identification requires laboratory analysis of air samples or surface samples by a certified laboratory. Never make high-stakes remediation decisions based on visual identification alone.
The most common molds found in US homes
Six mold genera account for the vast majority of indoor mold problems in US residential buildings — each with a characteristic appearance, preferred substrate, and health risk profile.
| Common Name | Scientific Name | Typical Color | Preferred Surface | Health Risk | DIY Eligible? |
|---|---|---|---|---|---|
| Cladosporium | Cladosporium sphaerospermum | Olive green to black | Fabrics, wood, paint | Low to moderate | Yes, under 10 sq ft |
| Penicillium | Penicillium chrysogenum | Blue-green, powdery | Wallpaper, insulation | Moderate | Yes, under 10 sq ft |
| Aspergillus | Aspergillus niger | Black, white, or gray | Walls, insulation, concrete | Moderate to high | With caution |
| Alternaria | Alternaria alternata | Dark brown to black | Shower interiors, windowsills | Low to moderate | Yes, under 10 sq ft |
| Stachybotrys | Stachybotrys chartarum | Black, slimy or powdery | Paper-faced drywall, wet wood | High at sufficient exposure | No — professional required |
| Chaetomium | Chaetomium globosum | White to gray to dark brown | Water-damaged drywall, wood | Moderate | With caution |
Sources: CDC mold health advisory; AIHA Guideline 3 — Microbial Assessment of Indoor Environments
Cladosporium is the genus you are most likely to find in a home with persistent humidity problems — on fabric-covered furniture near damp exterior walls, on the back of wooden picture frames, or on painted wood window trim in poorly ventilated rooms.
It is the most common indoor mold genus globally and, at normal residential exposure levels, poses low to moderate risk in otherwise healthy individuals. Penicillium is the fuzzy blue-green mold that colonizes building materials — particularly cellulose-based wallpaper, water-damaged insulation, and interior wall surfaces where condensation has been chronic.
Black mold (Stachybotrys): what it is and what it isn’t
Stachybotrys chartarum is the mold that dominates public anxiety about indoor mold — commonly called “black mold” or “toxic black mold.”
Understanding what it actually is, and what it is not, is essential to responding appropriately. Stachybotrys is a slow-growing mold that requires consistently wet conditions over an extended period — typically water-saturated cellulose-based material for at least one to two weeks before colonization begins.
It produces mycotoxins — specifically trichothecene compounds — in its spores and cell wall material. At sufficient exposure concentrations, these mycotoxins can cause serious adverse health effects, particularly in individuals with respiratory conditions, allergies, or immune compromise.
Here is the critical clarification that most online resources either overstate or understate. The specific health risk depends heavily on exposure concentration and individual sensitivity — many people live in homes with Stachybotrys present without experiencing significant symptoms, while others with asthma or immune compromise may experience significant symptoms at lower exposure levels.
The appropriate response is neither panic nor dismissal. It is professional testing and professional remediation. Visual identification cannot confirm Stachybotrys — the species requires laboratory analysis.
For a complete examination of Stachybotrys in residential settings, including testing protocols, removal procedures, and health implications, see our resource on everything homeowners should know about black mold.
Mold color as a guide: what green, white, and black growth signals
Color is the homeowner’s most accessible indicator — and also the least reliable for species identification.
Not all black mold is Stachybotrys, and not all dangerous mold is black. These color associations are useful starting points, not diagnoses.
Black or dark green mold on water-damaged drywall or wood with a slimy or wet appearance warrants the most urgent response — this pattern is consistent with Stachybotrys or Chaetomium, both of which indicate prolonged water saturation of the substrate. Do not disturb this growth without professional assessment.
Blue-green powdery growth is typically Penicillium or Aspergillus — both spread readily when disturbed. The powdery texture indicates active sporulation, and the actual boundary of the growth is likely larger than what is visually apparent.
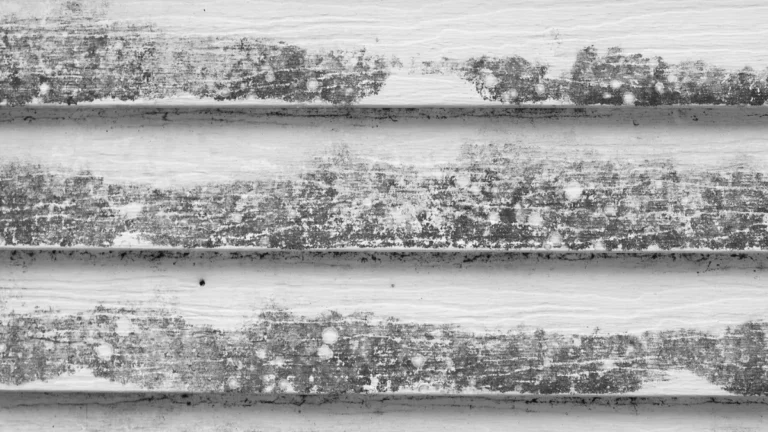
White fuzzy growth on wood or organic materials is most commonly early-stage Cladosporium or early Penicillium before pigmentation develops. White growth on concrete or masonry may be efflorescence rather than mold — apply the bleach test described in Section 3 to differentiate.
When mold type determines your remediation path
For most surface molds on non-porous materials, the species identification primarily informs your PPE selection and containment diligence rather than fundamentally changing the remediation process.
The situation changes significantly when visual or olfactory evidence suggests Stachybotrys or Chaetomium. Both require consistently waterlogged conditions to colonize building materials — if you are seeing either growth pattern, you have had a significant and sustained moisture problem that likely involves structural material removal, cavity inspection, and professional clearance testing.
The practical rule: if the mold appears slimy or gelatinous on a porous surface — especially paper-faced drywall or finished wood — treat it as potentially Stachybotrys until a lab result tells you otherwise. Do not attempt DIY remediation.
Health effects of mold exposure: what the evidence shows
The health effects of indoor mold exposure range from no noticeable effect in healthy individuals to significant respiratory illness in sensitive populations — and understanding where your household falls on that spectrum is essential to calibrating the urgency of your response.
ℹ️ Disclaimer: The health information in this section is provided for educational purposes and is not a substitute for medical advice. If you or any member of your household is experiencing health symptoms you believe may be related to mold exposure, consult a licensed physician. Individual responses to mold exposure vary significantly based on species, concentration, duration, and individual health factors.
Short-term vs. long-term mold exposure symptoms
Short-term exposure symptoms — typically appearing within hours to days of significant mold contact — include nasal and throat irritation, coughing, wheezing, eye irritation (redness, tearing, itching), skin irritation at contact points, and headache.
These symptoms are most likely to occur in individuals who disturb a significant mold colony without respiratory protection, or who spend extended time in a heavily contaminated environment. In healthy individuals without respiratory conditions, short-term symptoms typically resolve within 24 to 72 hours of leaving the contaminated environment.
Long-term or chronic exposure symptoms — resulting from weeks or months of living with mold — are more variable and often more difficult to attribute definitively to mold. They may include persistent respiratory irritation, chronic sinusitis, recurring headaches, fatigue, and in sensitive individuals, worsening mold exposure symptoms including more frequent asthma attacks.
According to the CDC’s guidance on mold and dampness in buildings, the evidence linking indoor mold exposure to respiratory illness is strongest for individuals who already have respiratory conditions or allergies, and moderately strong for causing new upper respiratory symptoms in previously healthy individuals.
For a detailed symptom checklist organized by body system — respiratory, neurological, and dermatological — see our guide on signs your household is experiencing mold-related health effects.
| Symptom Type | Likely Connection to Mold | Population Most Affected |
|---|---|---|
| Coughing, wheezing | Yes — well-established in research | Asthma patients, children, elderly |
| Nasal congestion, runny nose | Yes — common with mold allergies | General population |
| Eye irritation (redness, tearing) | Yes — from airborne spore contact | General population |
| Skin rash or irritation | Possible — from direct surface contact | Sensitive individuals |
| Chronic headaches | Possibly — linked to MVOC exposure | Sensitive individuals |
| Fatigue | Possibly — in high-exposure scenarios | General population |
| Memory or concentration difficulty | Claimed; evidence limited | Seek medical evaluation |
| Nosebleeds | Sometimes attributed; evidence weak | Seek medical evaluation |
Who is most at risk: the vulnerable populations in your household
Mold exposure risk is not equal across all household members — these populations require the most urgent protective response when mold is identified.
Individuals with asthma experience the most consistently documented harm from indoor mold exposure. Mold spores are a documented asthma trigger — both for acute attacks and for long-term worsening of asthma control.
EPA’s indoor air quality guidance on mold and health specifically identifies asthma as a condition that substantially increases susceptibility to mold-related health effects. Mold allergy — one of the most common indoor allergen sensitivities in the United States — causes allergic rhinitis symptoms at lower mold concentrations than non-allergic individuals experience.
Immunocompromised individuals — those receiving chemotherapy, living with HIV/AIDS, taking long-term corticosteroids, or who have undergone organ transplantation — face the risk of invasive mold infection. This is rare but serious, and any household with an immunocompromised member should treat any mold discovery as requiring immediate professional response.
Children under 12 have developing respiratory and immune systems that are more vulnerable to the chronic effects of mold exposure. The same spore concentration that might cause mild irritation in a healthy adult may cause more persistent effects in a young child.
Can mold make you sick after remediation is complete?
Residual mold spores can persist in settled dust and on surfaces even after visible mold has been successfully removed, and these spores may continue to trigger respiratory symptoms in sensitive individuals for a period following remediation.
Symptoms may continue for days to a few weeks after thorough remediation as the body clears accumulated exposure. If symptoms persist beyond four to six weeks after professionally confirmed clearance testing, evaluation by a physician is appropriate to rule out other causes.
Running a quality HEPA air purifier during and after remediation helps reduce airborne spore concentrations meaningfully during the recovery period.
When to see a doctor: symptoms that require medical attention
Most mold-related symptoms in healthy individuals resolve without medical intervention once the exposure source is removed. These symptoms warrant prompt medical evaluation regardless of mold status:
- Difficulty breathing, shortness of breath, or chest tightness that persists at rest and does not resolve with a change of environment.
- An asthma attack that does not respond adequately to rescue medication.
- Fever accompanied by respiratory symptoms following confirmed mold exposure — this combination may indicate a fungal respiratory infection.
- Any respiratory symptom in an immunocompromised individual following any known mold exposure, regardless of apparent severity.
- Persistent respiratory symptoms in an infant or toddler that are unexplained by other causes.
Finding the moisture source: where mold problems really begin
Remediating mold without resolving the moisture source is exactly like mopping a floor while the faucet is still running — you can work harder or faster, but the floor will always be wet again.
The moisture triangle: how mold needs only three things to grow
Mold growth requires three conditions: a food source (organic material — wood, paper, drywall, fabric), a temperature range (roughly 40°F to 100°F, which describes virtually every indoor environment in the US), and moisture.
Of these three conditions, homeowners can only meaningfully control one. You cannot remove all organic materials from your home without rebuilding it. You cannot maintain temperatures outside the mold growth range year-round.
But you can control moisture. Every mold prevention and remediation strategy ultimately reduces to moisture management — and understanding this principle changes how you think about everything that follows.
The 10 most common moisture sources in US homes
These are the moisture sources responsible for the majority of residential mold problems in the United States, organized from most to least frequently identified in professional inspections.
- Bathroom exhaust fan undersizing — the single most common cause of chronic bathroom mold. The correct formula is 1 CFM per square foot of bathroom floor area, minimum 50 CFM. Most builder-grade fans installed in US homes before 2010 are rated at 50 CFM regardless of room size — and often perform at 35 to 40 CFM actual airflow due to duct length and routing.
- Slow plumbing leaks at supply line connections, drain connections, and valve packing — particularly under sinks and in wall cavities behind supply shut-offs. These leaks are often too slow to create visible water staining for months, but they continuously wet surrounding wood framing and drywall.
- Roof penetration failure at plumbing vent boots, skylight flashings, and chimney step flashings. A failed rubber boot around a plumbing vent allows water entry during every rain event, dripping onto attic insulation and eventually through ceiling drywall.
- Thermal bridging at exterior wall framing — metal connector plates and framing members that bridge the interior warm space and the exterior cold surface create condensation points inside the wall cavity during heating season. This mechanism creates mold conditions without any plumbing leak or roof failure.
- HVAC condensate drain pan overflow — the condensate pan beneath the evaporator coil accumulates condensed water during operation and drains through a condensate line. When that line clogs — common in high-humidity climates — the pan overflows into the air handler cabinet and surrounding structure.
- Foundation wall moisture intrusion in basements and crawl spaces, where hydrostatic pressure forces groundwater through porous concrete block or poured concrete walls. Even walls that appear dry produce enough moisture vapor transmission to maintain elevated humidity in an unventilated basement.
- Dishwasher and refrigerator water line connections — compression fittings and braided supply lines at these appliances fail quietly over years, producing slow drips that saturate the cabinet floor and subfloor beneath.
- Inadequate site drainage directing surface water toward the foundation — a grading problem that causes water to pool against the foundation wall during every rain event.
- Negative interior air pressure in tightly sealed modern homes with high-exhaust-rate kitchen range hoods. A powerful range hood exhausting 600 to 1,200 CFM creates negative pressure that draws exterior humid air into wall cavities through any available penetration.
- Improperly terminated exhaust ducts — bathroom and dryer fans that terminate in the attic or crawl space, or that have deteriorated backdraft dampers allowing exterior humid air to flow back into the duct when the fan is off.
How to use a moisture meter to find hidden leaks
A moisture meter reading is the most valuable data point in any mold investigation — and a moisture meter costs a fraction of what a professional inspection costs.
Step 1 — Power on and select the correct material mode. Most consumer-grade meters have two modes: wood and building materials (drywall). Select the appropriate mode for the surface you are testing.
Step 2 — Establish a baseline reading. Test an area you are confident is dry and unaffected — a wall in the center of the home, away from any known moisture source. Note this reading as your dry baseline.
Step 3 — Test the perimeter of suspected areas. Working outward from the visible mold or suspected moisture intrusion point, press the meter’s pins against the surface at 6-inch intervals. Note any readings significantly above your baseline.
Step 4 — Map elevated readings. Mark the wall with painter’s tape at every point where readings exceed 20% in wood or 17% in drywall. The shape of the elevated-reading zone tells you where moisture is migrating from and in what direction.
Step 5 — Trace the moisture source. Follow elevated readings upward (ceiling-source leaks), laterally (plumbing leaks behind walls), and downward (foundation intrusion). The highest reading is typically closest to the source.
For comprehensive guidance on resolving every category of home moisture problem once the source is identified, see our dedicated resource on diagnosing and fixing moisture problems in your home.
Fixing the source before you remediate: why the order matters
The sequence is non-negotiable: fix the moisture source before, or simultaneously with, the remediation — never after.
During active remediation, you are removing affected materials and disturbing mold colonies. That process creates elevated airborne spore concentrations even with proper containment. If the moisture source is still active during that process, you are simultaneously clearing mold on one surface and creating conditions for new colonization on another — sometimes within the same containment zone.
The practical application: if your moisture source requires a licensed plumber and a two-week wait, do not begin mold removal. Contain the visible mold to prevent further spread, document the area, and schedule the plumbing repair first — then schedule mold remediation immediately after the repair is complete and the area has had 48 hours to dry.
DIY or hire a pro? The mold remediation decision guide
This is the most consequential decision in this entire article — and every current competitor makes it harder than it needs to be by giving you vague criteria instead of specific thresholds.
If the mold you’ve found is on a non-porous surface, covers less than 10 square feet, is not located in HVAC ductwork or structural framing, the moisture source has been resolved, and no household members are immunocompromised or have significant respiratory conditions — then yes, you can safely and effectively remediate it yourself using the process in Section 8.
Every other situation requires a professional assessment before you proceed. That is the direct answer. The decision framework below gives you the specific criteria to evaluate your own situation.
The five factors that determine your remediation path
These five factors, evaluated in sequence, determine whether DIY mold remediation is appropriate for your specific situation.
- Square footage of visible mold growth. Below 10 square feet and DIY is potentially appropriate. Above 10 square feet, professional assessment is required before any DIY work begins — the EPA’s residential guidance threshold establishes this standard clearly.
- Porosity of the affected material. Non-porous surfaces (tile, sealed concrete, glass, metal) can typically be cleaned and treated in place. Porous materials (drywall, wood framing, carpet, ceiling tile, insulation) almost always require removal of the affected material.
- Location of the mold growth. Surface mold on an accessible, visible, enclosed area is DIY-eligible. Mold in HVAC systems, inside wall cavities, in structural framing, or in any location you cannot fully access and contain is not.
- Household vulnerability. Any household member with asthma, a documented mold allergy, immune compromise, or who is under 12 years old changes the risk calculus significantly. Professional remediation provides containment quality and clearance verification that DIY cannot reliably match.
- Prior remediation history. If this area has been remediated before and the mold has returned, the moisture source was not fully resolved. Do not attempt a second DIY remediation — get a professional assessment that includes moisture mapping to identify why the first attempt failed.
When DIY mold remediation is the right choice
DIY remediation is appropriate when all of the following conditions are simultaneously true: the visible mold area is less than 10 square feet; the affected material is non-porous or a limited section of porous material (a single piece of drywall, a section of baseboard); the moisture source has been identified and repaired; no household member is in a high-risk category; the area can be fully contained during work; and you are willing to acquire and properly use the PPE the process requires.
Under these conditions, DIY remediation following the protocol in Section 8 will produce outcomes equivalent to professional work on comparable problems. The process is not difficult — it requires discipline, the right materials, and patience.
When professional remediation is non-negotiable
⚠️ Warning: The following conditions require professional remediation without exception. Attempting DIY remediation in any of these situations can spread mold contamination to unaffected areas, put vulnerable household members at risk, and create structural damage far more costly to repair than professional remediation would have been.
These situations require a professional mold remediation contractor without exception:
- Any visible mold area exceeding 10 square feet — the EPA’s established residential guidance threshold.
- Any mold in HVAC ductwork, air handlers, or on evaporator coils — HVAC mold must be remediated with the system shut down, requires specialized equipment, and must be followed by full duct cleaning.
- Any mold penetrating into structural framing members — joists, rafters, wall studs, or subfloor — that compromises structural integrity or requires demolition to access.
- Any mold where the full extent cannot be visually confirmed from the accessible surface.
- Any household with immunocompromised members.
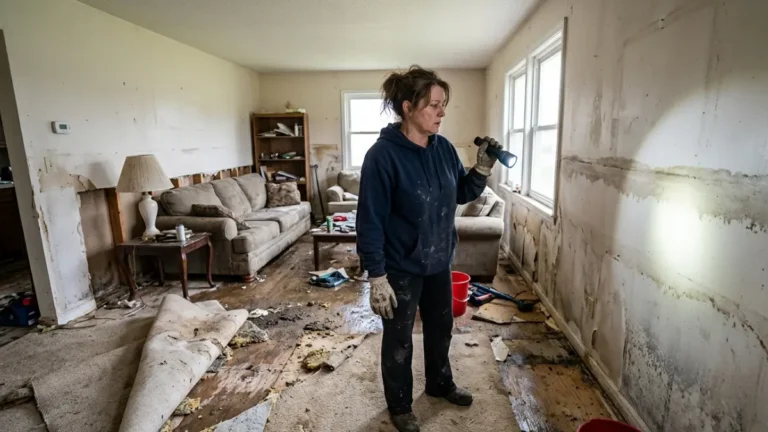
- Mold following flooding or Category 3 water damage (sewage backflow, floodwater) — floodwater carries pathogenic bacteria in addition to mold.
What types of mold always require a professional
While lab-confirmed species identification is the only way to definitively identify mold species, certain visual and contextual characteristics should prompt a professional response regardless of the visible area size.
Any mold on paper-faced drywall that has been chronically wet or water-damaged should be treated as potential Stachybotrys and handled by a professional until testing confirms otherwise. Any mold appearing in a gelatinous, wet, or heavily slimy growth pattern on organic materials warrants professional assessment.
Any mold in a home that has experienced basement flooding, a sewage backup, or a prolonged roof leak should receive professional assessment of the full scope before any remediation begins.
The hybrid approach: when to DIY the prep and hire for the work
A strategy that delivers both cost savings and professional-quality outcomes in many borderline situations is the hybrid approach — perform the preparation work yourself, hire a professional for the execution.
Specifically: handle documentation, moisture source repair, and temporary containment of the affected area yourself — and hire a professional for the remediation execution and clearance testing. This works particularly well when the mold is clearly visible and bounded but just over the 10-square-foot threshold, or when your budget constrains what you can spend on professional remediation but you can manage preparation independently.
How to remediate mold yourself: the complete step-by-step
This section is for homeowners who have completed the diagnostic router and the DIY vs. Professional framework in Section 7 and confirmed that DIY remediation is appropriate for their situation — if you have not completed that framework, return to Section 7 before continuing.
The process below is aligned with EPA residential remediation guidance and the IICRC S520 standard — adapted for homeowner execution.
What you’ll need: the complete materials and equipment list
Do not begin any remediation work until every item on this list is in hand — starting without proper PPE or containment materials is how DIY remediation goes wrong, and fixing a DIY remediation that created cross-contamination is significantly more expensive than calling a professional from the start.
Personal Protective Equipment:
- N95 respirator (minimum) — a 3M 8511 or equivalent, with an exhale valve for extended wear. For any mold growth on porous materials or any area where Stachybotrys is possible, use a P100 half-face respirator (3M 6503QL with 2097 P100 cartridges).
- Nitrile gloves — minimum 8-mil thickness. Do not use latex.
- Safety goggles — non-vented chemical splash goggles, not safety glasses with open vents.
- Disposable Tyvek coverall suit — prevents carrying spores through the home on clothing.
- Disposable boot covers.
Containment Supplies:
- 6-mil polyethylene sheeting — the minimum thickness for effective containment. The first time you set up containment in a 100 square foot bathroom, you will discover that standard 1.5-mil painter’s poly tears at the corners when taped to textured drywall — use 6-mil sheeting and do not compromise on this.
- 3M 3380 seam tape or equivalent high-adhesion HVAC tape — standard painter’s tape will not adhere reliably to poly sheeting for more than 12 hours.
- Box fan for negative air pressure setup.
- HEPA filter attachment for the fan, or a dedicated HEPA air scrubber if available.
Removal and Treatment Supplies:
- Antimicrobial mold-killing solution — EPA-registered options include Concrobium Mold Control (encapsulating formula, no harsh fumes, appropriate for most surfaces), RMR-86 (hydrogen peroxide-based, effective on porous surfaces), or Benefect Decon 30 (botanical-based, food-safe, appropriate for kitchens). A full comparison is available in our guide on the best mold-killing products that actually work.
- HEPA vacuum with sealed filtration — standard shop vacuums without HEPA filtration release fine particles back into the air.
- Stiff-bristle brush for surface scrubbing on non-porous materials.
- Drywall cutting tools if material removal is required — utility knife and drywall saw.
- Spray bottle or garden pump sprayer for antimicrobial application.
Disposal Supplies:
- 6-mil black polyethylene disposal bags — the minimum thickness for mold remediation waste. Standard 1.5-mil kitchen trash bags puncture during handling and release spores. Use dedicated 6-mil bags and double-bag all contaminated material.
- Duct tape for sealing disposal bags.

Step 1 — Protect yourself: PPE requirements before you touch anything
Before entering the work area, put on every item of PPE on the materials list — the most common DIY remediation error is partial PPE use.
Don PPE in this order: disposable coverall first, then boot covers, then gloves (tucked under the coverall cuff), then goggles, then respirator. This sequence ensures no skin gap between items.
When doffing after work, reverse the order exactly and place everything directly into a disposal bag before leaving the work area. Fit-test your respirator before entering the work area — with the respirator on, place both hands over the mask and exhale sharply. If you feel air escaping around the nose piece or chin edge, the seal is inadequate.
Step 2 — Contain the work area: building an effective containment zone
Containment is the step that separates professional-quality DIY remediation from the kind that spreads mold to previously unaffected rooms.
The goal is to create negative air pressure within the work area — meaning air flows into the contained zone rather than out of it, preventing spore migration to adjacent spaces.
- Seal all HVAC supply and return registers in the work area with poly sheeting and tape — this is the first step, before any sheeting is hung on walls or doorways.
- Cover the door opening with overlapping strips of 6-mil poly sheeting, taped to the door frame on all four sides with 3M 3380 tape. Leave one vertical strip unsealed on one side as a pass-through flap.
- Cover any windows in the work area with poly sheeting if you are not using them for exhaust.
- Place a box fan in one window of the work area, blowing outward. Seal around the fan with poly sheeting and tape. This creates the negative pressure — air will now flow into the room through any gap rather than out of it.
- Tape a layer of poly sheeting over the floor of the work area if it is carpeted — contaminated material and cleaning solution dripping onto carpet creates a secondary mold problem.
The containment zone is now established. Do not remove PPE or exit the containment zone without first placing all waste in sealed bags and removing outer PPE layers inside the zone before exiting.
Step 3 — Fix the moisture source (or confirm it’s fixed)
Before any mold is removed, confirm that the moisture source identified in Section 6 has been completely resolved.
Run your moisture meter over the affected area and surrounding surfaces. Readings should have stabilized since the source was repaired — elevated readings indicate the source is still active or the materials have not dried sufficiently.
Target moisture content before remediation begins: below 16% in wood and below 14% in drywall. Beginning remediation on materials still above these thresholds is working against yourself.
Step 4 — Remove affected materials safely
For porous materials — drywall, ceiling tile, carpet, insulation, and in some cases wood — physical removal is required.
Surface treatment of these materials will not achieve remediation. The mold has penetrated into the material structure, and the only way to remove it is to remove the material.
Drywall removal: Score the drywall with a utility knife at least 12 inches beyond the visible mold boundary on all sides — mold growth extends beyond what the eye can see. Cut along the score lines with a drywall saw, being careful not to saw into wiring or plumbing in the wall cavity. Seal each piece immediately in a 6-mil disposal bag inside the containment zone as you remove it.
After the drywall is removed, inspect the framing behind it. If the framing lumber shows gray or black discoloration that cannot be sanded clean, or if there is a slimy or powdery growth on the wood surface, the framing is also affected and requires treatment — or replacement in severe cases.
Carpet removal: Cut carpet and padding into manageable sections using a utility knife. Roll each section away from the affected area rather than carrying it open across the room. Bag immediately in 6-mil poly.
Step 5 — Clean and treat remaining surfaces
Once affected materials are removed, treat all remaining hard surfaces — framing lumber, concrete, tile, sealed wood — with your chosen antimicrobial treatment.
The treatment process differs by material type.
Non-porous surfaces (tile, concrete, sealed metal): Apply the antimicrobial solution and allow it to dwell on the surface for the manufacturer-specified contact time — typically 10 to 30 minutes. Scrub with a stiff brush and wipe clean with a damp cloth. Reapply and allow to dry without wiping for a residual antimicrobial effect.
Porous surfaces that remain (exposed framing lumber, concrete block, OSB sheathing): Apply antimicrobial solution by spray, allowing it to penetrate the surface. Do not scrub porous surfaces — scrubbing disturbs the surface and releases additional spores. Allow the solution to dwell for the full contact time and dry without wiping.
On exposed wood framing, apply a second coat after the first coat is completely dry. Encapsulating products like Concrobium work by forming a thin polymer film on the surface as they dry — allow a full 24 hours between application and any painting or finishing work.
Step 6 — Dry the area completely
Inadequate drying is the most common reason DIY mold remediation fails — homeowners remove the mold, apply a treatment, declare success, and then close the wall back up, leaving materials still above the moisture threshold.
After treatment, run a dehumidifier in the work area continuously until all moisture meter readings are consistently below 14% in drywall and 16% in wood across the full remediated area. This typically takes 48 to 96 hours depending on ambient humidity and the amount of material removed.
Verify with moisture meter readings — not by feel, not by appearance. Dry-looking wood can still hold enough moisture for mold regrowth.
Step 7 — Dispose of contaminated materials
All mold-contaminated material removed from the work area must be disposed of as follows: double-bagged in sealed 6-mil black poly bags, carried directly out through the exterior if possible (not through the rest of the house), and placed in standard municipal waste collection.
Mold-contaminated residential waste does not require special commercial disposal. Do not open bags after sealing.
Step 8 — Verify success and clear containment
Before removing containment, perform a final visual inspection of the entire work area under good lighting, including a flashlight inspection of wall cavities if any drywall was removed.
There should be no remaining visible mold growth. All surfaces should be dry, clean, and odor-free. Run your moisture meter one final time across all treated surfaces — confirm readings are below target thresholds throughout.
Consider commissioning a post-remediation verification clearance test — detailed in Section 11 — to document that normal mold conditions have been restored. This documentation protects you in insurance claims and real estate transactions.
Remove containment in reverse order of installation — beginning with the floor poly and working outward to the door covering. Fold all poly sheeting inward so that any trapped debris is enclosed, and bag the sheeting before removing it from the room.
What professional mold remediation involves: a homeowner’s guide
Understanding what professional remediation involves makes you a far better consumer — the homeowners who get the best outcomes are always the ones who understood the process well enough to recognize when it was being done correctly.
How to choose a certified mold remediation contractor
The baseline credential for mold remediation contractors in the United States is IICRC certification — specifically the Applied Microbial Remediation Technician (AMRT) credential.
The IICRC administers the S520 professional standard for mold remediation, and AMRT-certified technicians have completed training and examination in that standard. To verify a contractor’s IICRC certification, visit the IICRC’s official contractor directory. Enter the company name or zip code — verified certification appears in the search results.
If a contractor claims IICRC certification and does not appear in this database, they are not currently certified. Beyond IICRC certification, verify that the contractor carries general liability insurance specific to mold remediation work, workers’ compensation coverage for all personnel on-site, and can provide references from completed projects in your type of property.
What a professional remediation scope of work should include
A legitimate professional mold remediation scope of work is a written document — not a verbal estimate — that specifies each of the following elements:
- The specific areas to be remediated, with measurements.
- The materials to be removed, including material type and quantity.
- The containment method to be used and whether negative air pressure will be established.
- The antimicrobial products to be applied, including their EPA registration numbers.
- The drying protocol and target moisture content thresholds.
- The disposal method for all contaminated materials.
- The post-remediation verification approach — specifically, who performs clearance testing and when.
- The warranty or guarantee on the completed work.
Any contractor who provides a verbal scope or refuses to specify these elements in writing is not operating at professional standard.
How long mold remediation takes: timelines by scope
Timeline for professional mold remediation depends directly on the scope of the problem.
For minor surface mold in an accessible location — a bathroom ceiling, a small section of basement wall — a professional crew typically completes work in one to two days. For room-level mold requiring drywall removal and framing treatment, the active remediation work takes three to five days, followed by a drying period of two to three additional days before reconstruction can begin.
For whole-home mold events following major water damage or extended moisture intrusion, remediation typically spans one to four weeks depending on the number of affected areas and the amount of structural material requiring removal.
Do you need to leave your home during professional remediation?
For minor to moderate remediation work — a single room or contained area — most households do not need to vacate, provided the rest of the home is properly isolated from the work area and the HVAC system is shut down during active work hours.
For extensive remediation — multiple rooms, structural material removal, whole-home events — temporary relocation is strongly recommended for households with children, asthma sufferers, or immunocompromised members. If your contractor recommends relocation and you have health-vulnerable household members, follow that recommendation.
Red flags: what bad mold contractors do (and how to spot them)
The mold remediation industry has a well-documented problem with companies that perform inadequate or fraudulent work — these specific red flags indicate a contractor who is not operating at professional standard.
Quote without physical inspection. Any contractor who provides a firm bid based on a phone conversation or photographs without physically inspecting the property is guessing at the scope. A proper remediation scope requires in-person inspection including moisture mapping of the affected area.
Biocide-only treatment without containment. Applying antimicrobial spray to affected surfaces without building containment is not remediation — it is surface treatment. Any contractor who does not include containment in their scope is not performing IICRC-standard work.
Pressure to sign immediately. Legitimate contractors provide written proposals and allow time for review, questions, and comparison. High-pressure tactics are a reliable red flag regardless of the explanation offered.
No clearance testing in the scope. Remediation without post-remediation verification is incomplete work by professional standards. Any contractor who does not include clearance testing in their scope should be asked to explain in writing why it is absent.
Cannot provide proof of licensing and insurance. Request certificates of insurance before signing anything — a contractor who cannot provide these documents presents serious liability risk.
Recommends encapsulation over removal for extensively affected porous materials. Encapsulation — sealing mold in place rather than removing it — is appropriate for limited applications on structural materials that cannot be safely removed. It is not an appropriate primary treatment strategy for drywall, ceiling tile, or extensively affected wood framing.
Questions to ask before signing any remediation contract
Ask every contractor these specific questions before committing to any work.
- Are you IICRC AMRT certified, and can I verify this through the IICRC directory at iicrc.org?
- Can you provide a written, line-itemized scope of work before I sign anything?
- Who performs the post-remediation clearance testing — your company or an independent industrial hygienist?
- What antimicrobial products will you use, and can you provide their EPA registration numbers?
- What containment method will you use, and will you establish negative air pressure?
- What is your disposal protocol for contaminated materials?
- What does your work warranty cover and for how long?
- Can you provide three references from similar residential projects completed in the past 12 months?
Mold remediation costs: what homeowners actually pay in 2025
Mold remediation costs vary more than almost any other home repair category — and understanding the cost framework before you make any calls puts you in control of those conversations.
ℹ️ Disclaimer: Cost data in this section reflects national averages from industry cost research. Actual quotes in your area may vary significantly based on local labor rates, regional contractor density, the specific scope of your problem, and individual contractor overhead structures. Use these ranges as a benchmarking framework for evaluating quotes — not as a firm expectation of what you will pay.
Average mold remediation cost: national ranges by scope
| Scope of Problem | Average Cost | Low Range | High Range | Typical Timeline |
|---|---|---|---|---|
| Minor surface mold (under 10 sq ft, non-porous) | $500 | $150 | $900 | 1 day |
| Moderate room-level (10–50 sq ft, drywall removal) | $2,000 | $1,000 | $4,000 | 2–5 days |
| Significant multi-room (50–200 sq ft) | $5,500 | $3,000 | $10,000 | 5–10 days |
| Whole-home or structural (200+ sq ft) | $18,000 | $10,000 | $30,000+ | 2–4 weeks |
| HVAC system remediation | $3,000 | $1,500 | $8,000 | 2–3 days |
| Basement flooding event | $4,500 | $2,500 | $9,000 | 1–2 weeks |
Sources: HomeAdvisor national cost data; Angi cost research; RSMeans construction cost data, 2025
For a more detailed breakdown that includes contractor comparison guidance and regional pricing variations by state, our dedicated resource on what homeowners pay for mold remediation in 2025 provides expanded analysis.
Cost breakdown by location in the home
Location matters significantly in mold remediation cost because of access difficulty, material type, and the likelihood of cavity spread into adjacent materials.
| Location | Typical Cost Range | Key Cost Driver |
|---|---|---|
| Bathroom (surface/tile) | $500–$1,500 | Non-porous surface — lower material removal cost |
| Bathroom (with drywall involvement) | $1,500–$4,000 | Tile removal, drywall removal, vapor barrier replacement |
| Basement (surface wall treatment) | $1,500–$3,500 | Large surface area, containment complexity |
| Basement (with structural involvement) | $3,500–$9,000 | Framing involvement, extended drying required |
| Crawl space | $1,000–$6,500 | Access difficulty, encapsulation typically required |
| Attic | $1,500–$7,500 | Full roof deck assessment, ventilation correction required |
| Kitchen (under-sink/cabinet area) | $500–$2,500 | Cabinet removal, subfloor evaluation |
| Whole home (post-flooding) | $10,000–$30,000+ | Scope uncertainty, potential structural replacement |
What drives costs up: factors that increase your estimate
Several conditions reliably increase the final cost of remediation beyond baseline estimates — anticipating them before you receive your first quote prevents unpleasant surprises.
Structural material involvement — when mold has penetrated floor joists, wall studs, or roof rafters, the contractor must perform demolition to access the full growth area, treat or replace structural materials, and coordinate reconstruction.
HVAC system remediation added to residential scope — when HVAC mold is discovered during remediation, addressing it requires specialized duct cleaning equipment, evaporator coil cleaning or replacement, and UV light installation in some cases. This addition can double the cost of an otherwise moderate remediation.
Clearance testing delays — if the initial clearance test fails because conditions are not fully resolved, the contractor must perform additional remediation and schedule a second clearance test. Each cycle adds both time and cost.
Geographic location — labor rates in high cost-of-living markets (Northeast, California, major metro areas) run 30 to 60 percent above the national average for comparable remediation scope.
Emergency or same-day response — contractors who respond immediately to emergency situations typically charge 25 to 50 percent above their standard rates for that response premium.
What homeowners pay for specific remediation services
Beyond the scope-based estimates above, these are the line-item costs homeowners can expect to see in a detailed contractor proposal.
- Mold inspection and testing (pre-remediation): $300–$600 from an independent CMI; $150–$300 from some contractors (though independent testing is preferred for objectivity).
- Air sampling laboratory analysis: $30–$75 per sample; a comprehensive residential assessment typically includes 3 to 6 samples.
- Containment setup: $200–$600 depending on area size and complexity.
- HEPA air scrubber rental (per unit per day): $75–$150.
- Drywall removal and disposal: $2–$5 per square foot of material removed.
- Antimicrobial treatment: $3–$8 per square foot of treated surface.
- Post-remediation clearance testing: $200–$500 — should be included in the contractor scope or commissioned independently from an industrial hygienist.
How to get an accurate quote and avoid overpaying
Get a minimum of three quotes from IICRC-certified contractors — the range between the lowest and highest qualified quote for the same scope is often 40 to 70 percent.
Ask each contractor to provide a line-itemized scope of work, not a single lump-sum figure. Line items allow you to compare what each contractor is actually proposing to do — and to identify what one contractor is omitting that another is including.
Verify that clearance testing is included in the scope. If it is not, either negotiate its inclusion or plan to commission it independently from a certified industrial hygienist after work is complete — and budget $200 to $500 for that additional cost.
Do not make cost the primary selection criterion. The cheapest quote for mold remediation frequently reflects inadequate containment standards, lower-grade antimicrobial products, or absent clearance testing — all of which increase the probability of mold recurrence and higher costs in the future.
Mold testing before and after remediation: what you need to know
Testing is the element of mold management that homeowners most consistently either skip entirely or approach incorrectly — and those two mistakes produce very different, equally unfortunate outcomes.
Do you actually need a mold test before you start?
For visible mold growth on a clearly identified surface with a known moisture source, pre-remediation testing is generally not necessary.
If you can see the mold, identify where it is, and address the moisture source, you have enough information to begin remediation without lab confirmation. Pre-remediation testing adds the most value in three specific situations: when household members are experiencing health symptoms without a clearly visible mold source; when a real estate transaction depends on objective mold status documentation; or when the presence of Stachybotrys is suspected and the remediation approach depends on lab-confirmed species identification.
Types of mold testing: air sampling vs. surface testing vs. bulk sampling
| Test Type | What It Detects | Cost | Turnaround | Requires Professional | Best Use Case |
|---|---|---|---|---|---|
| Air sampling (spore trap) | Airborne spore concentrations and genera | $100–$250 with lab | 3–5 days | Yes | Baseline assessment, clearance testing |
| Surface tape lift | Mold species on specific surface | $30–$75 per sample | 3–5 days | No — kit available | Species ID on visible growth |
| Bulk sampling | Mold within a building material | $50–$100 per sample | 5–7 days | Yes recommended | Cavity mold, material evaluation |
| DIY home test kit | Presence/absence of spores | $10–$50 | 24–48 hours | No | Initial confirmation of mold presence |
| Post-remediation clearance | Full air quality vs. outdoor baseline | $200–$500 | 3–5 days | Yes — independent professional | Verifying remediation success |
DIY mold test kits: what they can and can’t tell you
DIY mold test kits — available at home improvement stores and online for $15 to $50 — provide a useful but limited function.
Most operate by exposing a petri dish with a growth medium to air or a surface for a specified period, then incubating the dish for 48 to 72 hours. Growth in the dish confirms that live mold spores were present in the sample. This is useful for answering the binary question: is there active mold here?
What DIY kits cannot tell you: the species of mold present, the concentration of spores in the air, whether that concentration is elevated above normal outdoor baseline, or whether the mold is in a location that poses a health risk. For species identification and concentration data, laboratory air sampling by a certified professional is required.
For a complete step-by-step walkthrough of the DIY testing process and a comparison of every major home mold test kit on the market, see our guide on how to test for black mold at home.
Post-remediation clearance testing: the standard and why it matters
Post-remediation clearance testing is the objective verification that mold remediation achieved its stated goal — returning the indoor environment to normal mold conditions.
Without clearance testing, remediation completion is based on visual inspection alone, which is insufficient. The professional standard for post-remediation verification is established by the American Industrial Hygiene Association’s microbial assessment guidelines. Clearance testing should consist of air sampling in the remediated area and an adjacent non-remediated area, compared against outdoor baseline samples taken at the same time.
A critical consumer-protection point that most mold remediation resources do not emphasize: clearance testing should be performed by an independent industrial hygienist — not by the same company that performed the remediation. A contractor certifying their own clearance has an obvious conflict of interest. The additional cost of an independent clearance — typically $200 to $400 — is insurance that the work was actually completed to standard.
How to know if mold remediation was successful
These are the specific indicators that a mold remediation has succeeded — and the basis on which a clearance certificate should be issued.
- Clearance air sampling results show spore concentrations and species diversity comparable to the concurrent outdoor baseline sample.
- Visual inspection of the remediated area by the clearance inspector shows no remaining visible mold growth on any surface.
- Moisture meter readings throughout the remediated area are consistently below 16% in wood and 14% in drywall.
- No musty or earthy odor is detectable in the remediated area under any conditions.
- Structural materials in and adjacent to the work area are intact and show no evidence of active moisture.
- A written clearance certificate has been issued by an independent industrial hygienist who did not perform the remediation work.
Room-by-room mold guide: every location in your home
Mold behaves differently in different parts of your home — because the moisture conditions, the building materials, and the ventilation characteristics of each space are fundamentally different, and so are the remediation approach, the typical cost, and the professional-versus-DIY threshold.
Bathroom mold: causes, cleaning, and long-term prevention
Bathroom mold is the most common residential mold problem in the United States — and the most consistently mishandled, because most homeowners address the visible symptom without addressing the ventilation deficiency that caused it.
The most common cause is inadequate exhaust fan capacity combined with the habit of closing the bathroom door during and after showering. This creates relative humidity levels of 80 to 100% for 20 to 40 minutes after every shower — repeated daily, year-round.
Mold appears in bathrooms at tile grout, caulk joints at the tub-to-wall intersection, the drywall behind the toilet tank (condensation), window frames, and the ceiling directly above the shower. Surface mold on tile and grout is non-porous and can be cleaned with an EPA-registered antimicrobial applied with a stiff grout brush.
The caulk joint at the tub surround must be completely removed and replaced — cleaning the surface of deteriorated caulk leaves residual mold in the joint and under the bead. Any moisture-stained or soft drywall requires removal and replacement with moisture-resistant cement board in shower-adjacent applications.
Typical cost: $500 to $1,500 for surface treatment; $1,500 to $4,000 if tile removal and substrate replacement are required. For a complete guide to bathroom mold causes and long-term prevention strategies, see our resource on bathroom mold cleaning and prevention.
Basement mold: why it’s different and what makes it harder
Basement mold presents challenges that no other room in your home does — primarily because basements operate as below-grade enclosures in direct contact with ground moisture, with minimal ventilation and low thermal mass that creates chronic condensation conditions.
The most common cause is foundation wall moisture intrusion combined with inadequate ventilation. Warm, humid summer air entering through basement windows condenses on cool concrete walls and floor — a physics problem, not a hygiene problem.
Poured concrete and concrete block walls are permeable to moisture vapor; even in the absence of visible water, moisture transmission through concrete walls maintains elevated humidity in an unventilated basement. Basement mold remediation is more complex than surface treatments because the moisture source — ground-contact concrete — cannot be resolved with a simple repair.
Remediation must be accompanied by a long-term moisture management strategy: vapor barrier installation on walls and floors, mechanical dehumidification to maintain RH below 50%, and correction of any exterior drainage deficiencies. Typical cost: $1,500 to $3,500 for surface treatment; $3,500 to $9,000 for extensive remediation with framing involvement.
For the complete remediation and prevention protocol, see our guide on the complete basement mold removal process.
Crawl space mold: the hidden threat under your home
Crawl space mold is the most underdiagnosed mold problem in US homes with pier-and-beam or partial-basement foundations — because homeowners rarely inspect their crawl spaces, and because the mold that grows there directly affects the floor structure of the living space above.
The most common cause is an uncovered or inadequately covered crawl space floor allowing ground moisture to evaporate upward. Combined with the poor ventilation of an enclosed below-grade space, this creates chronically elevated humidity that colonizes the wood floor joists and subfloor above.
A proper vapor barrier should cover the entire crawl space floor: 6-mil polyethylene minimum, seams overlapped 12 inches and taped, with the poly extending 12 inches up foundation walls on all sides. Professional remediation typically involves removing the existing failed vapor barrier, treating all affected structural wood with antimicrobial solution, and installing a new 10- to 20-mil poly vapor barrier.
Typical cost: $1,000 to $6,500 depending on size and severity. For the full treatment protocol, see our guide on crawl space mold causes and how to fix them.
Attic mold: why it’s often worse than it looks
Attic mold is a problem that grows for months or years without any visible indicator in the living space — and by the time it is discovered during a home inspection or roofing repair, the growth is often extensive.
The most common cause is inadequate attic ventilation combined with one or both of these specific defects: a bathroom exhaust fan ducted into the attic rather than through the roof (extremely common in homes built before 2000), or insufficient soffit-to-ridge ventilation balance. When warm, humid air from the living space enters the attic and contacts cold roof sheathing in winter, it condenses on the wood surface — and that persistent condensation creates ideal mold colonization conditions.
The critical distinction: the extent of attic mold growth is almost always larger than what is visible in photographs. A visible 3×3 foot dark patch often indicates 20 to 30 square feet of actual colonized surface on the roof deck above.
Attic mold remediation must address the ventilation deficiency as the moisture source correction — otherwise recurrence is guaranteed within one to two heating seasons. Typical cost: $1,500 to $7,500. For the complete treatment and prevention sequence, see our resource on why attic mold develops and how to eliminate it.
Kitchen mold: under the sink and behind appliances
Kitchen mold is most commonly a localized problem originating from a specific slow leak — under the sink, at the dishwasher drain hose, or at refrigerator water line connections.
Because these leaks occur in enclosed cabinet spaces, they are often not discovered until the cabinet floor shows visible staining or soft spots. Kitchen mold remediation typically involves removing the affected cabinet floor material, treating the subfloor beneath, drying completely, and replacing with exterior-grade plywood treated with a mold-inhibiting sealant.
Cabinet interior surfaces that show mold growth should be cleaned with antimicrobial solution if the material is solid wood; laminate-covered particle board that shows mold on any surface requires replacement because the mold has penetrated through the laminate at any edge or seam. Typical cost: $500 to $2,500 depending on the extent of subfloor involvement.
HVAC system mold: when it becomes a whole-home problem
⚠️ Warning: HVAC mold is always a professional-only remediation. Do not attempt DIY treatment of any mold in air handling equipment, ductwork, or on evaporator coils. Running a contaminated HVAC system during any remediation attempt distributes spores to every room served by that system — shut it down immediately if mold is suspected and keep it off until professional assessment and remediation are complete.
HVAC mold is the most serious category of residential mold problem because it converts a localized mold issue into a whole-home air quality problem.
A moldy evaporator coil or contaminated duct section distributes spores to every room in the house during every operating cycle — which may run several times per hour in peak season. The most common cause is condensation on the evaporator coil combined with a clogged condensate drain line that allows standing water to accumulate in the drain pan.
HVAC mold remediation requires shutting down the system, accessing and cleaning the air handler and evaporator coil, clearing and treating the condensate drain system, cleaning or replacing affected duct sections, and following remediation with a HEPA-equipped duct cleaning. Installing a UV-C germicidal light in the air handler after remediation provides effective long-term prevention.
Mold prevention after remediation: keeping it gone for good
A successful remediation is an investment — and protecting that investment means maintaining the specific conditions that prevent mold from re-establishing itself, which are more specific and more achievable than most homeowners realize.
The humidity target: keeping your home below 50% relative humidity
The single most impactful mold prevention measure is maintaining indoor relative humidity consistently below 50%.
At RH above 60%, mold can colonize almost any organic surface given enough time. At RH below 50%, mold cannot establish itself even when spores are present — and spores are always present. Measure indoor RH with a digital hygrometer — an inexpensive device ($12 to $30) available at hardware stores.
Place one in your basement, one in your primary bathroom, and one in the main living area. If any reading consistently exceeds 55%, you have a humidity control problem that requires mechanical correction.
In basements and crawl spaces, maintaining RH below 50% typically requires a desiccant dehumidifier or a high-capacity refrigerant dehumidifier sized for the space. Dehumidifier capacity is measured in pints of water removed per day — a 50-pint dehumidifier handles approximately 800 to 1,000 square feet of basement at moderate ambient humidity.
For a high-humidity climate, size up by 25 to 30 percent. Our resource on the best dehumidifiers for basements evaluates the leading options by actual performance capacity.
Ventilation fixes that prevent mold from returning
Ventilation is the second line of defense against mold recurrence — and it is underinvested in most US homes.
Bathroom exhaust fan upgrade: Replace any fan that does not provide 1 CFM per square foot of bathroom floor area. For a 60 sq ft bathroom, the minimum is a 60 CFM fan — and that is the minimum under ideal conditions. The Panasonic WhisperCeiling FV-11VFL is a reliable option that performs at its rated airflow, unlike many builder-grade alternatives.
Exhaust fan ducting correction: Any bathroom or kitchen exhaust fan that terminates in the attic rather than through the roof must be re-ducted. Attic termination is a building code violation in most US jurisdictions and one of the most reliably documented causes of attic mold.
Crawl space ventilation: Ensure that crawl space foundation vents are open during summer months and are not obstructed by insulation or debris. If your crawl space remains chronically humid despite open vents, consider encapsulation with a conditioned or dehumidified crawl space design.
What kills mold permanently — and what doesn’t
Nothing kills mold permanently in the sense of preventing any future mold growth — mold spores are a natural part of the environment and are always present in indoor air.
What antimicrobial products and treatments do is eliminate active mold colonies, reduce surface conditions that support growth, and create residual barriers that inhibit recolonization. Maintaining conditions — primarily humidity below 50% — that make recolonization impossible is the closest thing to permanent mold prevention that exists.
On previously affected surfaces, a mold-inhibiting encapsulating primer — Zinsser BIN shellac-based primer is the industry benchmark for this application — applied before repainting provides a durable barrier that inhibits surface mold colonization on painted walls. Apply this treatment after confirmed clearance and adequate drying.
Does mold come back after remediation?
Mold returns after remediation when the moisture source that enabled the original growth was not fully resolved, or when a new moisture source develops in the same area.
Properly executed mold remediation — with confirmed moisture source resolution, adequate drying to below-threshold moisture content, appropriate antimicrobial treatment, and post-remediation clearance testing — has a high long-term success rate. If mold recurs within six to twelve months of remediation, the moisture source investigation was incomplete. Get a second professional assessment focused specifically on moisture mapping — not a repeat remediation, which will fail for the same reason the first one did.
For prevention strategies specifically following a flooding or water damage event, our dedicated guide on preventing mold after water damage covers the critical 24 to 72 hour window when mold establishment can still be prevented through rapid response.
Building a year-round mold prevention routine
Spring: Inspect exterior foundation grading and ensure all surface drainage directs water away from the foundation at a minimum slope of 1 inch per foot for the first 6 feet. Clear gutters and downspouts. Test dehumidifiers before peak humidity season begins.
Summer: Monitor indoor RH weekly with your hygrometer. Run dehumidifiers continuously in basements and crawl spaces. Ensure bathroom exhaust fans run for at least 20 minutes after every shower. Inspect refrigerator and dishwasher water line connections for moisture under cabinets.
Fall: Have the HVAC system serviced, including evaporator coil inspection and condensate drain cleaning. Inspect the attic for any signs of roof leak discoloration on the underside of roof sheathing. Check window caulking and weatherstripping for gaps.
Winter: Monitor for condensation on windows — persistent condensation indicates indoor RH is too high for the outdoor temperature. Run bathroom exhaust fans during and after every shower even in cold weather. Check under sinks monthly for moisture or mineral deposits indicating slow leaks.
Insurance, legal obligations, and mold disclosure explained
The financial and legal dimensions of your mold situation deserve the same careful attention as the physical remediation itself — and the consequences of acting on wrong information in this area can be significant.
ℹ️ Disclaimer: The information in this section reflects general principles. Insurance coverage is governed by the specific terms of your individual policy. Mold disclosure laws vary by state. Tenant rights vary by jurisdiction. Consult a licensed insurance agent for coverage questions specific to your policy, and consult a licensed real estate attorney in your state for disclosure and tenant-right questions.
Does homeowner’s insurance cover mold remediation?
Homeowner’s insurance coverage for mold remediation depends on what caused the mold — not on the mold itself.
Mold resulting from a sudden, covered water damage event — a burst pipe, an appliance supply line failure, or storm-driven roof damage — is typically covered because the underlying water damage event is covered. Mold resulting from long-term neglect, gradual leaking, flooding from outside the home, or deferred maintenance is typically not covered because the triggering event is excluded from standard policies.
This cause-based coverage framework is why documentation of the moisture source is so important from the first day of your mold response. If a burst supply line caused your mold, document the cause with dated photographs before any repairs, retain the plumber’s invoice documenting the failure, and notify your insurer before beginning remediation work.
How to file a mold-related insurance claim successfully
A successful mold-related insurance claim requires thorough documentation at every stage of the process.
Photograph all visible mold and all visible moisture damage before any cleaning or demolition begins. Retain all repair invoices for the moisture source repair. Commission a professional mold inspection report that documents the extent of mold growth, its likely origin, and its connection to the covered water damage event.
Notify your insurer as early as possible — most policies have a notification requirement that, if violated, can affect coverage availability. Do not proceed with major demolition or material removal until your insurer has sent a claims adjuster or provided written authorization.
Our complete resource on filing a homeowner’s insurance claim for mold damage walks through each documentation step in the sequence that produces the best claim outcomes.
Mold disclosure obligations when selling your home
Real estate disclosure laws in the United States are state-governed, and mold disclosure obligations vary significantly across jurisdictions.
In most states, sellers are required to disclose known material defects to buyers — and documented mold history, including completed remediation, typically qualifies as a material defect requiring disclosure. Attempting to conceal a known mold history in a real estate transaction — even one that was professionally remediated — creates significant legal liability.
Post-remediation clearance documentation, photographs of the completed work, contractor invoices, and the clearance certificate should be preserved and provided to buyers. A disclosed, remediated mold history with documentation is far less damaging to a home sale than a mold problem discovered during the buyer’s inspection after inadequate disclosure.
Tenant rights and landlord responsibilities for mold
In rental properties, mold responsibilities are shared between tenants and landlords — and the division of responsibility varies by state law.
Generally, landlords are responsible for maintaining habitable conditions, which in most US jurisdictions includes addressing moisture intrusion and mold problems resulting from structural defects, plumbing failures, or building envelope failures. Tenants are typically responsible for maintaining adequate ventilation and reporting mold or moisture problems promptly.
If you are a renter who has discovered mold and your landlord is not responding, consult your local housing authority or tenant rights organization for jurisdiction-specific guidance. Do not withhold rent without legal counsel — rent withholding procedures vary by state, and procedural errors can expose tenants to eviction risk even when the underlying landlord non-compliance is clear.
Mold remediation FAQ: answers to every question homeowners ask
1. What is the difference between mold removal and mold remediation?
Mold removal cleans visible mold from a surface without addressing the underlying cause or verifying through testing that normal conditions have been restored. Mold remediation is the complete process: identifying extent, containing spread, removing affected materials, treating surfaces, eliminating the moisture source, and confirming through clearance testing that the problem is fully resolved. Removal treats the symptom. Remediation treats the cause.
2. Can I remediate mold myself, or do I always need a professional?
DIY mold remediation is appropriate when visible mold covers less than 10 square feet, is on a non-porous or limited porous surface, the moisture source has been resolved, and no household members have respiratory conditions or immune compromise. Every other situation benefits from professional assessment before any remediation begins — the criteria are specific and non-negotiable.
3. How much does mold remediation cost on average?
Professional mold remediation cost varies by scope. Minor surface treatment in a bathroom runs $500 to $1,500. Moderate room-level remediation with drywall removal typically costs $1,500 to $4,000. Extensive multi-room or structural mold remediation ranges from $5,000 to $30,000 or more. Always get three quotes from IICRC-certified contractors and require line-itemized scopes before selecting anyone.
4. What is the 10-square-foot rule for mold remediation?
The 10-square-foot rule comes from EPA residential guidance and establishes roughly a 3×3 foot area as the threshold above which professional remediation is recommended for homeowners without specialized training. Below that threshold, properly equipped homeowners can typically remediate safely. However, mold location and material type also determine whether DIY is appropriate, regardless of the visible area size.
5. Is black mold more dangerous than other types of mold?
Stachybotrys chartarum — commonly called black mold — produces mycotoxins that can cause serious health effects, particularly in individuals with respiratory conditions or immune compromise. However, not all black-colored mold is Stachybotrys, and visual identification alone cannot confirm the species. Any suspected Stachybotrys requires professional lab testing and professional remediation, not DIY surface treatment.
6. How long does professional mold remediation take?
Minor surface mold remediation in a single accessible area typically takes one to two days. Room-level remediation with drywall removal takes three to five days for active work, plus two to three additional drying days. Whole-home or structural mold remediation following major water damage typically takes one to four weeks depending on the number of affected areas and scope.
7. Do you need to leave your home during mold remediation?
For limited remediation in a single room with proper containment, most households do not need to vacate. For extensive remediation involving multiple rooms, structural material removal, or whole-home events, temporary relocation is strongly recommended for children, asthma sufferers, and immunocompromised members. Always follow your certified mold contractor’s specific recommendation based on the scope of your project.
8. What type of mold always requires professional remediation?
Any mold in HVAC ductwork or air handling equipment, any mold penetrating structural framing members, and any mold covering more than 10 square feet requires professional mold remediation. Additionally, mold with a slimy growth pattern on paper-faced drywall or wood — consistent with Stachybotrys — should be treated as requiring professional assessment until lab testing confirms otherwise.
9. Can mold come back after remediation?
Mold returns after remediation when the moisture source was not fully resolved or when a new moisture source develops in the same area. Properly executed remediation — with confirmed moisture source resolution, drying to below-threshold moisture content, appropriate antimicrobial treatment, and post-remediation clearance testing — has a high long-term success rate. Recurring mold indicates incomplete moisture investigation.
10. How do I know if mold remediation was successful?
Successful mold remediation is confirmed by: clearance air sampling results comparable to the outdoor baseline, no remaining visible mold on visual inspection, moisture meter readings below 16% in wood and 14% in drywall, no musty odor, intact structural materials, and a written clearance certificate issued by an independent industrial hygienist who did not perform the remediation.
11. Does homeowner’s insurance cover mold remediation?
Coverage depends on cause. Mold from a sudden, covered water damage event — a burst pipe or appliance failure — is typically covered. Mold from gradual leaking, neglect, or outside flooding is typically excluded. Mold coverage language varies significantly between policies and insurers — consult your specific policy and a licensed insurance agent before assuming coverage exists.
12. What kills mold permanently?
No product eliminates mold permanently because mold spores are always present in indoor air. EPA-registered antimicrobial products eliminate active colonies and create residual protection against recolonization on treated surfaces. The only lasting mold prevention is maintaining indoor relative humidity consistently below 50% — this creates environmental conditions in which mold cannot establish itself regardless of spore presence.
13. How do I prevent mold after water damage?
Begin drying within 24 to 48 hours of any water intrusion — mold can begin colonizing wet building materials within 24 to 72 hours at room temperature. Remove standing water, run dehumidifiers and fans continuously, remove saturated materials that cannot dry within 48 hours, and treat all wet surfaces with an EPA-registered antimicrobial after drying.
14. What are the signs that I have a mold problem in my home?
Key signs of mold include: visible discoloration on walls, ceilings, or floors; a persistent musty or earthy odor; water stains or peeling paint; unexplained respiratory symptoms that improve when you leave the home; condensation on windows; and a history of flooding or water damage within the previous 12 to 24 months. Two or more signs warrant a full investigation.
15. How do professionals test for mold?
Professional mold testing uses air sampling — collecting airborne spore samples with a calibrated pump and spore trap cassette, analyzed by a certified laboratory — and surface or bulk sampling for species identification of visible growth. Post-remediation clearance testing compares indoor air samples to concurrent outdoor baseline samples and should be performed by a certified industrial hygienist, not the remediating contractor.
Your mold remediation action plan: the next step from here
You now have everything you need to make the right decision about your mold situation — and what you do in the next 48 hours matters more than anything else.
Your three-step action plan based on your situation
If you are taking the DIY path: You have confirmed your situation meets the criteria in Section 7. Gather your full materials list from Section 8 before the weekend. Fix or confirm the moisture source is resolved. Build containment before touching the mold. Execute the eight-step process exactly as described, in order. Commission clearance testing when the area has dried to target moisture levels.
If you are hiring a professional: Get three quotes from IICRC-certified contractors. Require a written scope of work from each. Compare what each scope includes — particularly containment protocol, antimicrobial products specified, and clearance testing. Do not sign anything that does not include post-remediation clearance testing, or plan to commission it independently from an industrial hygienist.
If you are still assessing: Commission a professional mold inspection. A Certified Mold Inspector will document the extent of the problem, identify the moisture source, and provide a written assessment that defines the remediation scope. This is the most valuable investment you can make before committing to any remediation approach.
The Gladewick resources that belong in your bookmark bar
This guide covers the full arc of mold remediation — but for deeper coverage of specific topics within your situation, these are the resources most relevant to where you are right now.
If you completed DIY remediation: our guides on mold-killing products and preventing mold after water damage will help you protect the investment you just made.
If you are hiring a professional: our detailed cost breakdown gives you the benchmarking data to evaluate contractor quotes, and our insurance claim guide walks through the documentation process if you are filing a claim.
If you are in the monitoring phase: our black mold testing guide and our health symptoms resource help you track whether your situation is progressing or stabilizing.
A note on professional help: when to call today
Calling a professional is not a failure — it is the right decision for situations that require the containment quality, equipment capability, and clearance verification that professional remediation provides.
If your situation meets any of the non-negotiable criteria in Section 7 — extensive mold, HVAC involvement, structural material, household vulnerability — make that call today. The cost of professional remediation is real. The cost of inadequate remediation — mold recurrence, health consequences for vulnerable household members, structural damage discovered at resale — is far greater.
At Gladewick, every guide we publish is built around a single standard: that you leave better equipped than when you arrived. Every decision you make from here is yours — and you now have everything you need to make it well.
Where Beautiful Homes Begin.