Here’s How to Remove Mold from Drywall Without It Coming Back
Drywall mold persists above 17% moisture — and bleach makes it worse. Here’s the 5-step removal sequence that actually keeps it from coming back.
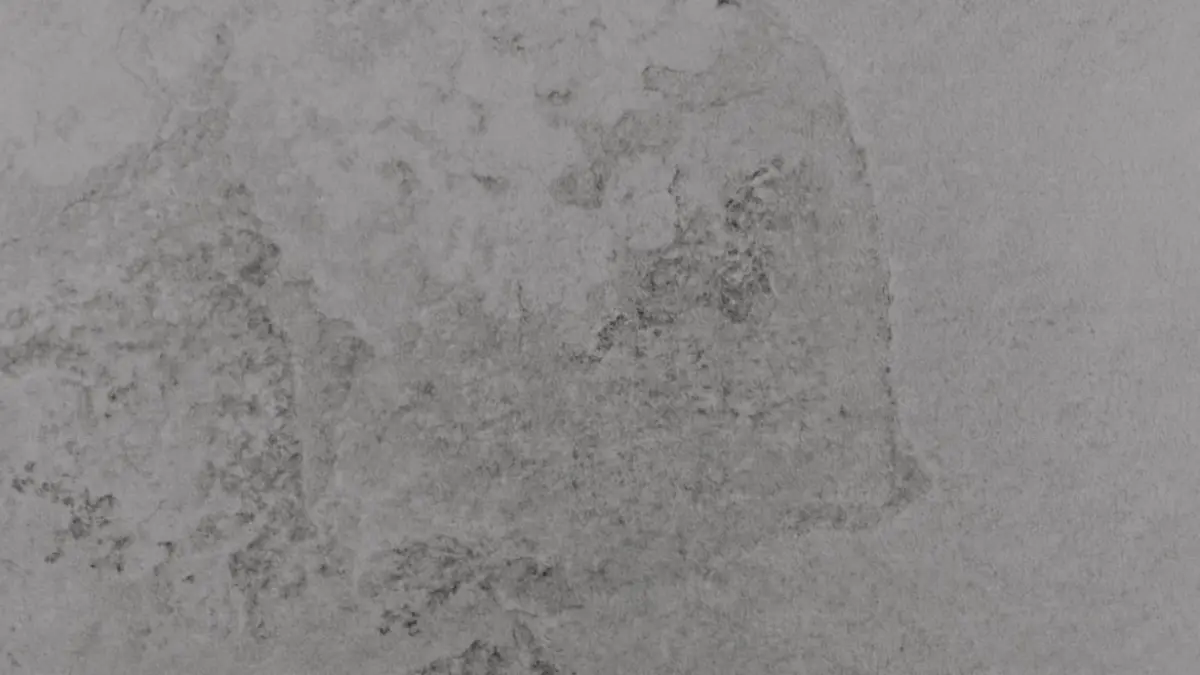
Table of Contents
Mold on your drywall? Here’s what to do first
You found mold on your drywall — and the right move is to act now, methodically, before it spreads to adjacent surfaces.
The better news is that drywall mold removal is a genuine DIY job for most homeowners when the patch is small, confined to the surface, and you follow the correct sequence.
What you’re actually dealing with (surface vs. deep mold)
Surface mold grows on the paper face of the drywall without penetrating the gypsum core — this is cleanable, encapsulatable, and the focus of this guide.
Deep mold has worked into the gypsum itself after weeks or months of elevated moisture, and no cleaning product will make that safe to leave in place.
The distinction matters before you pick up a single product, because one situation calls for cleaning and the other calls for replacement.
For a complete picture of mold problems throughout your home — from attic to crawl space — our mold remediation diagnostic plan walks through every scenario, surface type, and decision point.
The one question to answer before you touch anything
Before you disturb the surface, ask: Is this patch smaller than 10 square feet and limited to the visible wall face?
If yes, you are likely in DIY territory — the triage section below confirms the verdict with specifics.
If no, or if you are not certain, keep reading before you open a single container.
How bad is it? A mold severity triage guide
Most guides skip the most important step — helping you determine whether this is a Saturday afternoon project or a contractor call.

Use this table to match your exact situation to the right response before spending a dollar on supplies.
| Patch Size | Mold Color | Location | Verdict |
|---|---|---|---|
| Under 3 sq ft | White, gray, or green | Visible surface only | DIY — proceed |
| 3–10 sq ft | Any color | Visible surface only | DIY with full PPE — follow every step |
| Over 10 sq ft | Any color | Any | Call a professional |
| Any size | Black | Any | Confirm species — likely call a pro |
| Any size | Any color | Behind drywall | Call a professional |
Source: EPA mold cleanup guidance for homeowners and IICRC S520 classification criteria
How to measure the affected area correctly
Measure the widest point in each direction and multiply — do not estimate, because people consistently underestimate mold growth spread by 30 to 50 percent once cleaning begins and more area becomes visible.
If the patch is irregular, trace it on a piece of paper first, then measure the outline.
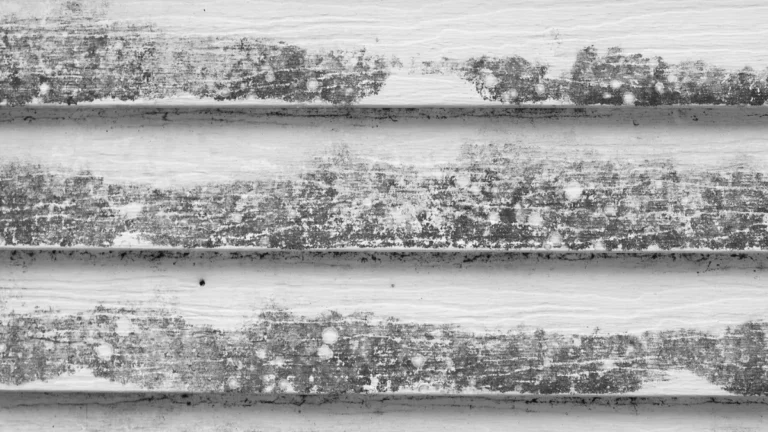
Mold color and what it means for your approach
White, gray, and green surface molds are typically Cladosporium or Penicillium species — both are common household fungi that respond well to the antimicrobial products covered in this guide.
Black mold is the term most people fear, but not every black-colored colony is Stachybotrys chartarum, the most hazardous species — texture matters as much as color for identification. For removal guidance organized by species and surface, our black mold removal guide by surface type covers every scenario.
How to tell if mold has gone behind the drywall
Press the drywall surface gently in the affected area — if it gives, feels soft, or sounds differently hollow than surrounding sections, moisture has compromised the gypsum core.
A musty odor that returns within 48 hours after surface cleaning is the clearest indicator that active mold is living behind the wall, not on it.
If you are weighing whether a DIY mold removal approach is appropriate for your specific situation, this guide on exactly when DIY mold removal is the right call gives you a clear framework for the decision.
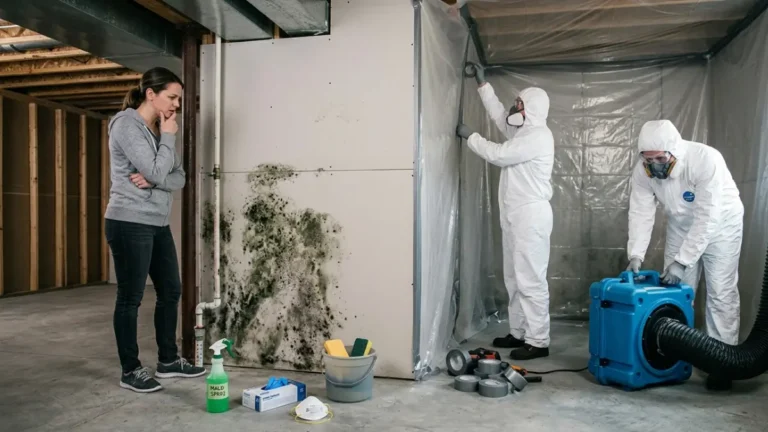
What you need before you start: supplies and prep
Walking into a mold removal project without the right equipment is how a contained 2-square-foot patch becomes an airborne event in a shared HVAC system.
Gather everything on this list before you open the work area.
Full supply list (with better alternatives noted)
Before removing mold from drywall, confirm you have all of the following — missing any single item is reason to stop and get it before proceeding:
- N95 respirator (minimum) — a standard dust mask does not filter mold spores; use N95 or P100 filter class only
- Nitrile gloves — latex punctures more easily and degrades faster against cleaning chemicals
- Sealed safety goggles — not reading glasses; full-seal goggles that block airborne spore contact
- Heavy plastic sheeting and painter’s tape — for complete room containment
- HEPA vacuum — a standard household vacuum blows spores back into the air; rental is fine for a one-day project
- Antimicrobial mold spray — Concrobium Mold Control or RMR-86 are the two most reliable surface-penetrating options
- Stiff-bristle scrub brush
- Mold-encapsulant primer — Zinsser Mold Killing Primer or KILZ Premium; standard primer does not have antimicrobial properties
Working in a bathroom where multiple surfaces are affected? The technique for grout, caulk, and painted drywall differs — our bathroom mold removal guide for grout, caulk, and walls covers each surface with its own removal method.
Setting up your workspace safely
Tape plastic sheeting over every HVAC vent, air return, and doorway in the work area before beginning — mold spores travel through duct systems efficiently, and a contained drywall problem can quickly become a mold problem in your air ducts if containment is skipped.
Leave a small gap at the floor level of the doorway covering so air flows out of the room rather than in.
What to do before you mix or spray anything
Put on your respirator, gloves, and goggles before you step into the work area — not after you’ve assessed the surface up close.
A large share of DIY over-exposure incidents happen because the homeowner geared up after already disturbing the mold surface.
⚠️ Warning: Never mix bleach with any other cleaning product. Bleach combined with ammonia produces toxic chloramine gas. Bleach combined with vinegar produces chlorine gas. Use one product at a time, and rinse surfaces completely between any product changes.
How to remove mold from drywall: step by step
With your room contained, your PPE on, and your supplies within reach, here is the exact sequence for drywall mold removal — in the order that prevents spread and produces a durable result.
Step 1: Contain the area and protect yourself
Confirm that plastic sheeting covers every vent and doorway in the work area, with the doorway sheet gapped at the floor.
Put on your N95 respirator, nitrile gloves, and goggles before entering — this step happens before you touch the wall, not after.
Step 2: Dry-remove loose mold spores (before any liquid)
Run your HEPA vacuum across the mold surface with the brush attachment before applying any liquid product — this removes the loose surface spore layer that liquid application would push deeper into the drywall paper.
Every experienced remediator knows this step; almost no DIY guide includes it, which is exactly why mold staining returns within months of “successful” cleaning.
Step 3: Apply your mold-killing solution
Here is the direct answer to the question most readers arrive with: bleach does not effectively kill mold on drywall.
Bleach works on non-porous surfaces like tile and glass, but drywall’s paper face is porous — bleach evaporates before it penetrates to the mold’s root structure (hyphae). Use a hydrogen peroxide-based or quaternary ammonium product like Concrobium Mold Control or RMR-86 instead.
💡 Expert Note: Apply your mold-killing spray and let it dwell for the full time listed on the product label — typically 5 to 10 minutes. Wiping or scrubbing immediately after application removes the active ingredient before it has done its job.
Step 4: Scrub, rinse, and dry completely
Scrub with your stiff-bristle brush using firm circular motions, wipe the area clean with a damp cloth, and dry immediately with a fan running on high.
A moisture meter reading on the cleaned area should fall below 17% MC before any primer or paint is applied — sealing in active moisture above this threshold guarantees mold recurrence within weeks.
Step 5: Apply encapsulant primer before repainting
Standard interior primer does not seal residual mold staining and provides no antimicrobial barrier — you need a mold-encapsulant primer specifically formulated for remediated surfaces.
Zinsser Mold Killing Primer or KILZ Premium both bond to residual spore debris and create an antimicrobial layer; apply one full coat, let it cure completely per label instructions, then apply your finish paint.
✅ Pro Tip: Two thin coats of encapsulant primer outperform one thick coat every time. Thin coats cure faster, bond more uniformly to the drywall paper face, and are less likely to show brush marks under finish paint.
Mold removal safety: what you must know first
Some people should not attempt DIY drywall mold removal at all — and this section tells you plainly who they are before you proceed.
Who should never attempt DIY mold removal
If any of the following applies to you or to anyone living in the home during the project, hire a professional:
- Pregnant women — airborne mold spore exposure during the first and second trimester carries documented respiratory and developmental risks
- Anyone with asthma, COPD, or chronic obstructive lung disease
- Immunocompromised individuals — chemotherapy patients, organ transplant recipients, anyone on immunosuppressant medication
- Children under 12 or adults over 70 who will be in the home during work
- Anyone who has already developed symptoms after exposure to the affected area
⚠️ Warning: If you suspect black mold (Stachybotrys chartarum) — identifiable by a slimy (not powdery) texture and a history of flooding or long-term moisture in that wall — do not attempt removal regardless of patch size. Have the species confirmed by a professional before any disturbing contact.
Symptoms that mean you’ve been over-exposed
Stop work immediately and move to fresh air if you experience any of the following during or after the project: persistent coughing, eye burning or redness, headache, dizziness, or a metallic taste.
The CDC’s indoor mold health information page outlines the full spectrum of mold-related health effects and documents when medical evaluation is warranted.
For projects involving basement mold, where confined spaces significantly increase spore concentration during removal, our guide to basement mold treatment and safe removal covers the ventilation and containment modifications specific to that environment.
Disposing of mold-contaminated materials legally
Seal all contaminated materials — plastic sheeting, disposable suits, used cleaning cloths, cut-out drywall sections — in heavy-duty garbage bags before removing them from the work area.
Most municipalities accept bagged mold debris in regular household solid waste collection; verify with your local waste authority if you are removing structural material.
ℹ️ Disclaimer: This guide covers surface mold removal on drywall patches under 10 square feet by healthy adults with no respiratory conditions or immune system compromise. Any situation outside these parameters requires a licensed mold remediation contractor.
DIY vs. professional mold remediation: cost and when to hire
Every mold project eventually becomes a math problem — how much does DIY cost versus hiring out, and at what point does the professional option become the better value?
Here are real numbers.
What DIY mold removal actually costs
| Supply Item | Estimated Cost |
|---|---|
| N95 respirator (10-pack) | $15–$30 |
| Nitrile gloves + sealed goggles | $15–$25 |
| Concrobium or RMR-86 spray (32 oz) | $15–$25 |
| Mold-encapsulant primer (1 quart) | $20–$35 |
| Plastic sheeting + painter’s tape | $15–$20 |
| HEPA vacuum rental (1 day) | $40–$60 |
| Total estimated DIY cost | $120–$195 |
A DIY mold removal project for a patch under 10 square feet runs $120 to $195 in materials and equipment rental — assuming the moisture source is already fixed and damage is surface-only.
For project-specific cost estimates organized by location in the home, our mold remediation cost guide broken down by room gives you realistic budgets before you commit to either path.
What professional remediation costs (and what affects the price)
| Project Scope | Estimated Professional Cost |
|---|---|
| Small patch under 10 sq ft | $500–$1,200 |
| Medium area, 10–30 sq ft affected | $1,200–$3,000 |
| Large area or structural involvement | $3,000–$7,000+ |
| Whole-home or post-flood remediation | $10,000–$30,000+ |
Source: National contractor average estimates; costs vary by region, scope, and structural involvement
Professional mold remediation costs are driven primarily by affected square footage, whether structural elements require replacement, and whether the occupants need temporary relocation during work.
If you are wondering whether your homeowner’s policy will offset any of these costs, our breakdown of when homeowners insurance covers mold remediation explains exactly which scenarios qualify and what documentation you need.
Questions to ask before hiring a mold remediation company
Before signing any contract, get clear answers to each of the following:
- Do you follow the IICRC S520 mold remediation standard for containment, removal, and clearance testing?
- Are your lead technicians individually IICRC-certified — can you provide documentation?
- What does your post-remediation clearance testing process involve, and who conducts it?
- Will you provide a written scope of work before starting and a clearance report after?
- Is your company licensed and insured for mold remediation work in this state specifically?
For a full contractor vetting process, our guide to finding a mold remediation company you can actually trust walks through every step from first call to final clearance report.
For attic mold — which follows different moisture dynamics and access constraints than drywall removal — our attic mold removal cost and safety guide is the right resource.
How to stop mold from coming back on drywall
If the moisture source is not fixed, every step in this guide will need to be repeated.
That is not a cautionary footnote — it is the entire point of mold prevention.
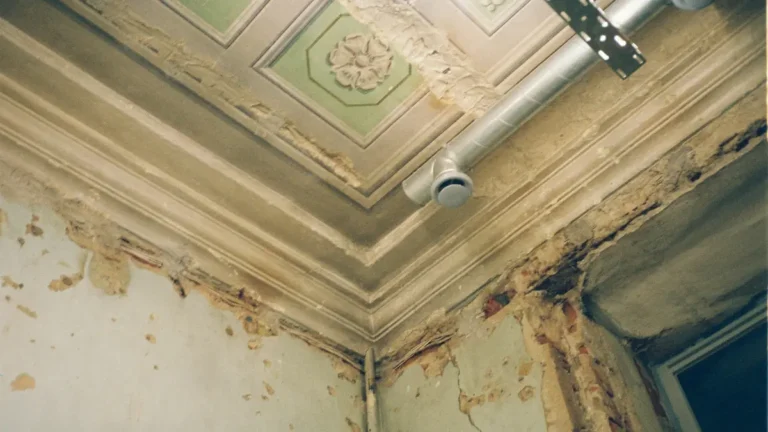
Fix the moisture source first (or nothing else matters)
A moisture meter reading above 17% MC anywhere in the treated area means active moisture is present — and active moisture means mold will return regardless of what you cleaned or primed.
The three most common hidden sources in drywall: pipe sweating inside a wall cavity, a bathroom exhaust fan venting into the wall rather than outdoors, and HVAC condensate lines draining near the wall base.
For moisture problems originating below the floor level, our crawl space mold removal guide covers the source identification and remediation steps specific to below-grade moisture intrusion.
The right primer and paint for mold-prone surfaces
Apply a mold-resistant encapsulant primer — Zinsser Mold Killing Primer or KILZ Premium — as your base coat before any finish paint goes on the treated area.
The antimicrobial agents in these primers bond to residual spores that cleaning missed; using standard primer on a porous, previously-molded surface is the reason the same spot molds again within six months.
Ventilation changes that make the biggest difference
Bathroom exhaust fans should move at minimum 1 CFM per square foot of floor area — most builder-grade fans in homes under 20 years old fall measurably short of this.
Running your exhaust fan for 20 minutes after showering ends — not just during — removes the residual humidity layer that is responsible for the majority of drywall mold in bathrooms.
✅ Pro Tip: A dehumidifier set to 45–50% relative humidity in any below-grade or poorly ventilated room costs about $30 per year to run and eliminates the moisture conditions that enable mold growth entirely.
Frequently asked questions about drywall mold removal
1. Is it safe to remove mold from drywall yourself?
Yes — removing mold from drywall is safe for most healthy adults when the affected area is under 10 square feet, confined to the visible surface, and proper PPE including an N95 respirator is worn throughout. Anyone who is pregnant, immunocompromised, or has a respiratory condition should hire a licensed professional regardless of patch size.
2. What kills mold on drywall?
Hydrogen peroxide-based and quaternary ammonium antimicrobial products — including Concrobium Mold Control and RMR-86 — are the most effective options for killing mold on drywall. These products penetrate the porous paper face of drywall, which bleach cannot do reliably. Apply the product, allow it to dwell for the full label time, then scrub and rinse.
3. How do I know if mold is behind drywall?
Signs of mold behind drywall include a persistent musty odor that returns within 48 hours after surface cleaning, soft or spongy wall texture when pressed, visible surface staining that recurs after treatment, and unexplained respiratory symptoms in household members. A moisture meter reading above 17% MC near the affected area confirms active moisture — a prerequisite for hidden mold.
4. Does bleach kill mold on drywall?
Bleach kills mold on non-porous surfaces like tile, but it does not effectively kill mold on drywall. Drywall’s paper face is porous — bleach evaporates before it can reach the mold’s root structure beneath the surface. Use a hydrogen peroxide-based or quaternary ammonium antimicrobial product instead, and allow full dwell time before scrubbing.
5. Can painted drywall with mold be cleaned?
Yes — painted drywall with mold can be cleaned when the paint surface is intact and the mold is confined to the surface layer. Apply antimicrobial spray, allow it to dwell, scrub, rinse, and dry completely. Areas where paint is peeling, bubbling, or heavily stained indicate deeper moisture penetration and likely require cut-out and replacement rather than surface cleaning.
6. When should moldy drywall be replaced instead of cleaned?
Moldy drywall should be replaced when the affected area exceeds 10 square feet, when the gypsum core feels soft or crumbles on contact, when mold has penetrated both sides of the panel, or when the same area has been cleaned and mold has returned. The EPA recommends replacement when cleaning cannot address the full depth of contamination.
7. How long does it take to remove mold from drywall?
A small drywall mold removal project under 3 square feet takes approximately two to four hours including containment setup, HEPA vacuuming, product dwell time, scrubbing, and drying. Patches up to 10 square feet may require six to eight hours spread across two days, since the cleaned surface must dry below 17% MC before encapsulant primer can be applied.
8. What PPE do I need to remove mold from drywall?
At minimum, wear an N95 respirator, nitrile gloves, and sealed safety goggles for any drywall mold removal work. For affected areas over 3 square feet, add a disposable Tyvek suit to prevent spore transfer to your clothing and other rooms. Standard dust masks and latex gloves do not provide adequate protection against airborne mold spores.
9. Can mold come back after cleaning drywall?
Yes — mold can return after cleaning if the moisture source is not eliminated. Cleaning removes visible growth but does not change the moisture conditions that caused it. Using a mold-encapsulant primer after cleaning and improving ventilation significantly reduce recurrence risk, but fixing the moisture source first is the only measure that prevents mold from returning permanently.
10.How much does professional mold remediation cost?
Professional mold remediation for a small drywall area under 10 square feet typically costs $500 to $1,200. Projects ranging from 10 to 30 square feet run $1,200 to $3,000. Large-area or structural remediation can reach $7,000 or more. Region, contractor certification level, scope of containment required, and whether post-remediation clearance testing is included all affect the final cost.
11. What is the best product to kill mold on drywall?
The most effective products for drywall mold removal are Concrobium Mold Control and RMR-86, both formulated to penetrate porous surfaces and disrupt mold’s cellular structure. Apply according to label instructions, allow full dwell time, then scrub and rinse thoroughly. Follow with a mold-encapsulant primer — Zinsser Mold Killing Primer or KILZ Premium — before any finish coat.
12. How do I prevent mold from growing on drywall?
Preventing drywall mold requires fixing active moisture sources, maintaining indoor humidity below 50%, running bathroom exhaust fans for 20 minutes after showers, and finishing any repaired drywall surface with mold-resistant encapsulant primer and paint. Annual inspection of walls behind large furniture in humid rooms catches early growth before it spreads to adjacent surfaces.
13. Is black mold on drywall dangerous?
Black mold on drywall is potentially dangerous, but not all black-colored mold is Stachybotrys chartarum, the most hazardous species. True Stachybotrys has a slimy — not powdery — texture and is most common in areas with a documented flooding or chronic leak history. If the mold matches that profile, do not disturb it — call a certified professional for species confirmation first.
14. How do I contain mold when removing it from drywall?
To contain mold during drywall removal, seal all air vents, HVAC returns, and doorways with plastic sheeting and painter’s tape before any surface contact. Leave a small gap at the floor level of the doorway covering so air flows outward. HEPA vacuum the surface before applying any liquid to prevent disturbing loose spores into the room air.
15. Can I paint over mold on drywall?
No — painting over mold on drywall does not kill it and does not stop it from growing. Mold actively grows through paint layers, and standard paint and primer contain no antimicrobial properties. The correct sequence is: clean and treat the mold first, apply mold-encapsulant primer, then apply finish paint. Painting over active mold accelerates structural damage to the drywall core.
16. What causes mold to grow on drywall?
Mold grows on drywall when moisture content in the material rises above 17% MC and remains elevated for 24 to 72 hours. The most common causes are bathroom condensation without adequate exhaust ventilation, slow pipe leaks inside wall cavities, roof leaks that migrate down the wall, and HVAC condensation near exterior walls. Eliminating the moisture source is the only permanent fix.
17. Does drywall mold spread to other rooms?
Yes — drywall mold can spread to other rooms when disturbed without proper containment. Mold spores are airborne and travel through shared HVAC ductwork, open doorways, and on the clothing of anyone working in the area. Sealing the work area with plastic sheeting before any contact is non-negotiable — it keeps a localized surface problem from becoming a whole-home air quality problem.
You’ve got this — here’s your next step
You now have the full system: a severity triage, a complete supply list, a five-step removal process, the safety parameters, and a prevention plan that actually holds.
Quick recap: the 3 decisions that determine your outcome
Every drywall mold project comes down to three calls — confirm it is surface-level and under 10 square feet, follow the removal sequence without skipping the HEPA vacuum or dwell time steps, and fix the moisture source before you prime.
Get those three right and the mold stays gone.
Your next step right now
If your project is DIY-ready, buy your supplies today and block out a full day.
If your scope is larger than this guide covers — or if you need a contractor you can trust — our mold remediation diagnostic plan is the natural next read, covering every mold scenario from diagnosis through final clearance.